MAVinci Desktop: Creating a Localization
-
To work in a Local Coordinate system when collecting UAS data, perform the following steps:
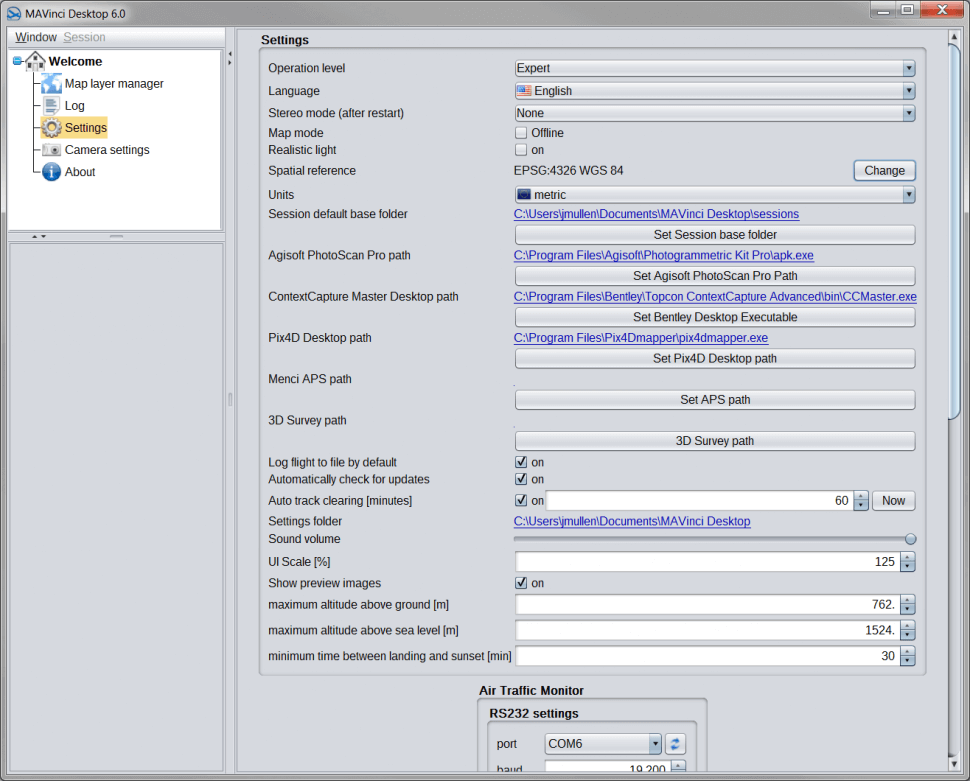
- On the Welcome screen, select Settings.
- Next to Spatial Reference, select Change.
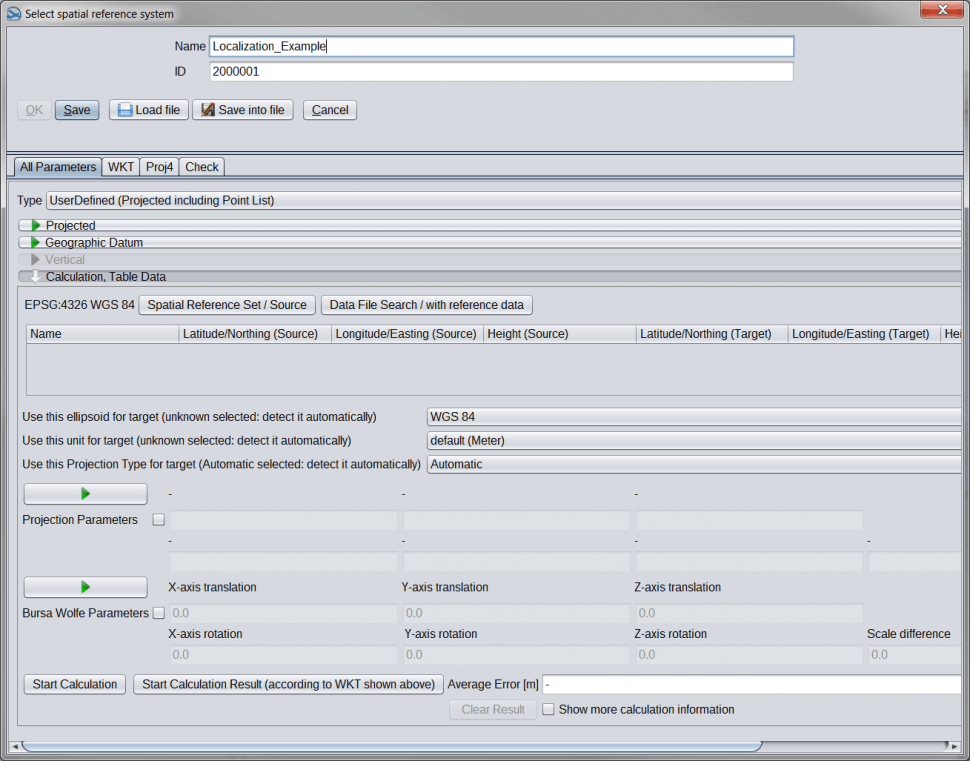
- Select New to define a new coordinate system.
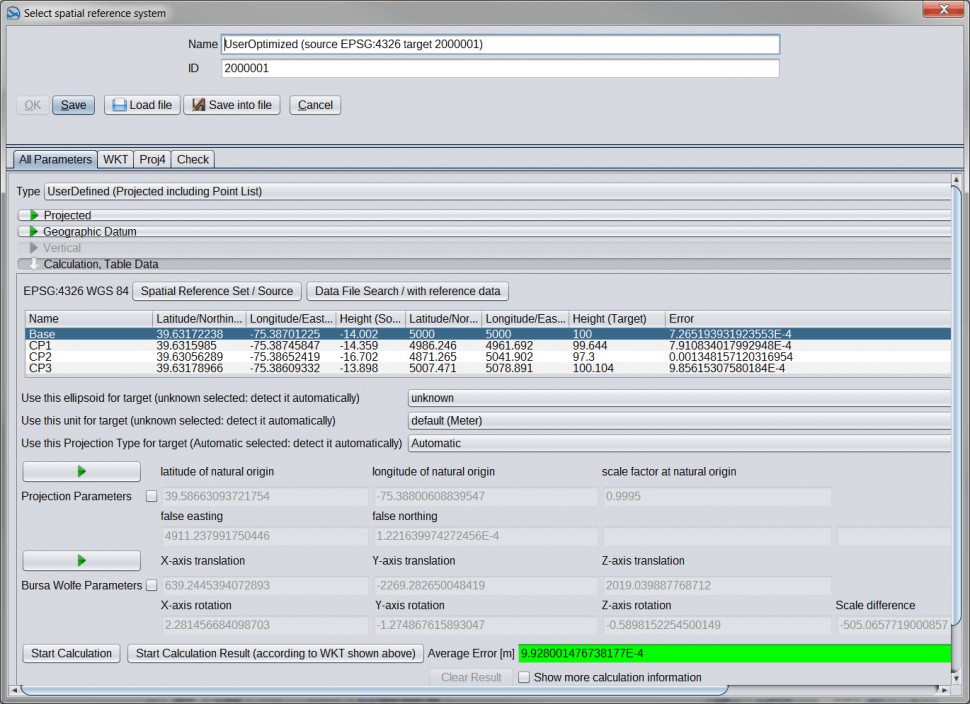
- Under the Calculation/Table Data section, select the Spatial Reference Set/Source button.
- Select the coordinate system for the known surveyed control points (absolute coordinates, not local).
- Under the Calculation/Table Data section, select the Data File Search/with Reference Data button.
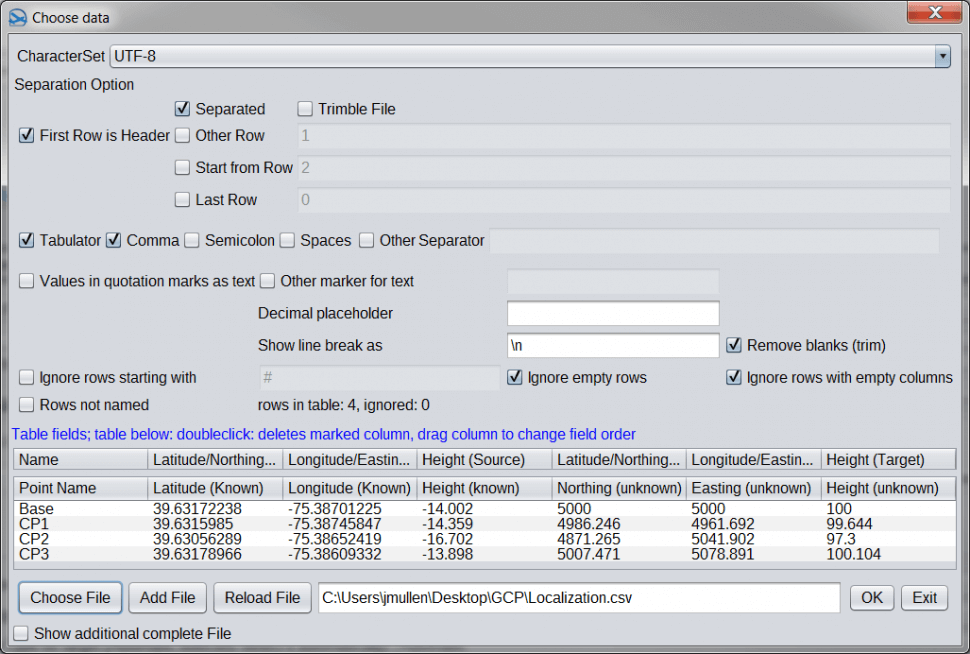
- Configure the structure of the *.txt or *.csv coordinate file to be imported as necessary (i.e. delimiter type, header information, etc.).
- Select Choose File.
- Navigate to the location on the PC of the *.txt or *.csv file to be imported and select Open.
- Once the file has been imported successfully, click Ok.
-
Regarding File structure, to be able to use default settings on this screen for a given *.txt or *.csv file, the structure should be:
- Latitude/Northing (known),
- Longitude/Easting (known),
- Height (known),
- Latitude/Northing (unknown),
- Longitude/Easting (unknown),
- Height (unknown)
- Easiest way to create the *.txt or *.csv file is using Excel, Notepad or similar.

-
Under the Calculation/Table Data section, select the following from their respective pull down menu’s:
-
Ellipsoid for the local coordinate system from the pull down menu:
- Typically this will be set to unknown.
- Select the unit of measurement for the local coordinate system.
-
Select the Projection for the local coordinate system. ]
- Typically this will be set to Automatic.
-
Ellipsoid for the local coordinate system from the pull down menu:
- Once finished, select Start Calculation.
-
The projection parameters and the average error will be calculated for the localization and will be displayed on this screen as red, orange, or green.
-
For the best results, the values for the average error should display as green.
-
-
If the results are adequate for the user, select Yes to the dialog box that appears to use these projection parameters.
-
Select Save to save the projection for future use in MAVinci Desktop
-
To save the local projection information for use in other applications (i.e. Topcon Context Capture):
-
Select the WKT tab, copy and paste the projection information to a notepad file and save as a *.wkt file.
-
Select the Save Into File button and save the projection as a *.prj file.
-