The following steps apply to the SL-100:
- Remove the eight (8) retaining screws from the base of the SL-100.
- Remove the base.
NOTE: When working with multiple SL-100’s at one time, be careful not to mix bases as the unit's serial number and other important information is marked on the label affixed to the base.

- Insert the SIM card into the SIM card slot.
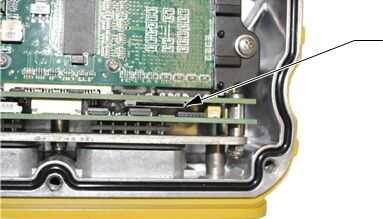
- Reinstall the base and the eight (8) retaining screws using Blue Loctite and torque to 12 in-lbs.
NOTE: Failure to tighten all screws to the recommended torque may lead to moisture or dust entering the SL-100.
IMPORTANT NOTE: To activate the SL-100 on the CDMA network using the Topcon data plan you must first cancel your existing contract with your CDMA provider (either Verizon or Sprint). This MUST be done prior to entering in the provisioning request in TopNET live Manager.
Information needed before configuration:
- SL-100 Serial Number
- Modem Serial Number, also called the IMEI/MEID number (see Capture Modem Serial Number section in this document for instructions on obtaining the modem serial number)
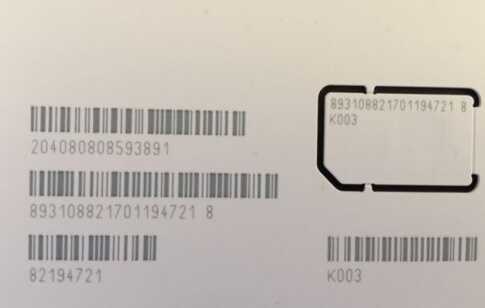
- ICCID Number from Topcon SIM card (19 digit number that starts with 8931)
- Topcon SIM card installed in the SL-100 (see Quick Guide: SL-100: Adding Topcon SIM card – SIM Card Installation (Part 1 of 3) for instructions on installing the SIM card)
Connecting to the SL-100:
There are multiple ways to connect to the SL-100:
- QTWeb on a GX-60
- PC web browser (Programming cables 1001270-01 and 1001269-01 required)
- MCXConfig on a GX-55
Configuring Ethernet Adapter:
The process for connecting on a GX-60 and a PC are virtually identical.
- You must configure the Ethernet adapter settings on a GX-60 and PC to connect to the SL-100 web interface.
-
For the GX-60/Windows XP:
- Start > Settings > Control Panel > Network Connection > Local Area Connection > Properties > Internet Protocol (TCP/IP) > Properties.
-
For Windows 7 and up:
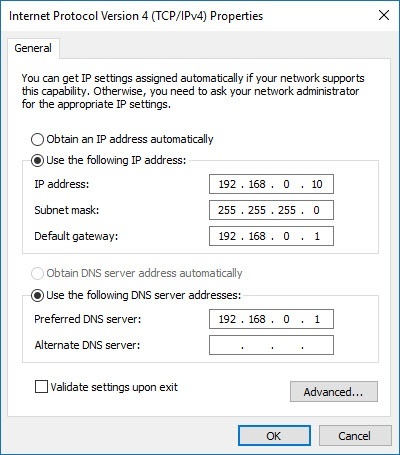
- Start > Control Panel > Network and Sharing Center > Change Adapter Settings > Right Click > Properties > Internet Protocol Version 4 (TCP/IPv4) > Properties.
- IP Address: 192.168.0.10
- Subnet Mask: 255.255.255.0
- Default Gateway: 192.168.0.1
- Preferred DNS server: 192.168.0.1
NOTE: MCXConfig is a standalone application for the GX-55. Editing the network adapter settings is not required.
Connecting to the SL-100:
-
Open QTWeb on the GX-60 or any web browser on a PC and enter the following address:
- 192.168.0.1
- For a GX-55, open MCXConfig.
-
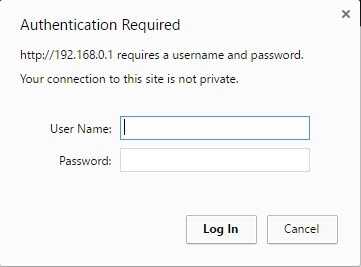
Enter the following credentials on the login screen:
- Username: admin
- Password: admin
- Select Log In
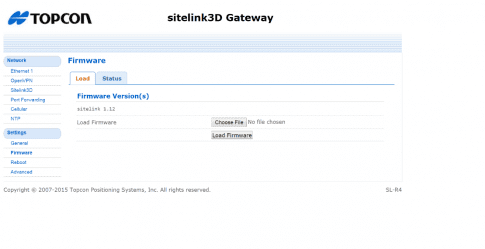
Check Firmware Version:
- Select Firmware
- Verify that version 1.12 or later is displayed for an SL-100 with an SLR4 modem board OR version 10.00.5 or later is displayed for an SL-100 with an SLR3 modem board
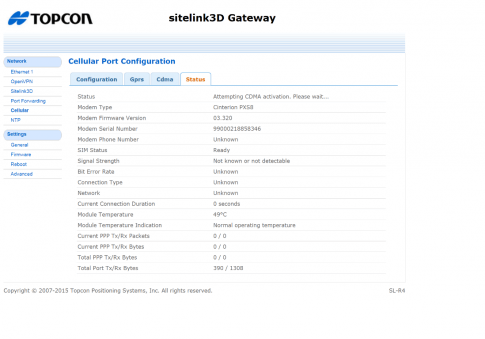
Capture Modem Serial Number:
- Select Cellular
- Select Status
- Verify that the Modem Firmware Version is v03.32 or later
- Capture the Modem Serial Number (14 digits)
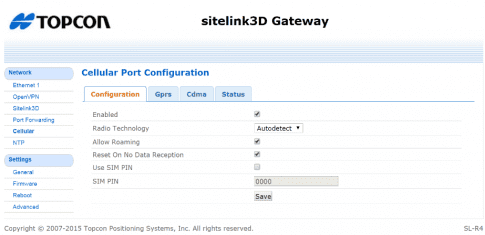
Configure the SL-100 Settings:
- Select Cellular
- Select Configuration
-
Verify/Change the following:
- Enabled: Checked
- Radio Technology: Autodetect
- Allow Roaming: Checked
- Reset on No Data Reception: Checked
- Use SIM PIN: Unchecked
- Select Save
- Select GPRS
-
Verify/Change the following:
- APN: m2mc.tierra
- Username: WAP@CINGULARGPRS.COM
- CINGULAR1
- Select Save
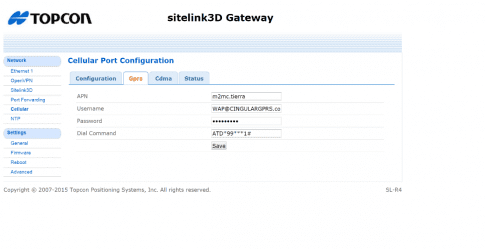
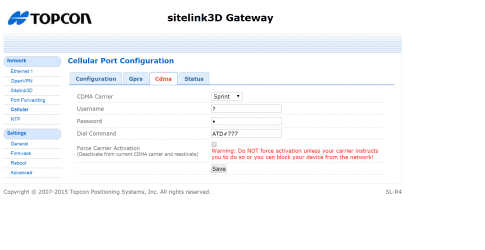
- Select CDMA
-
Verify/Change the following:
- CDMA Carrier: Sprint
- All other settings can remain as default
- Select Save
