Creating Field Codes
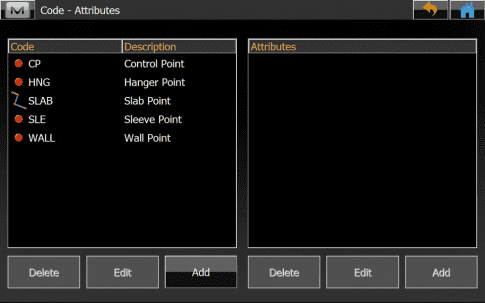
- Create your Field Codes in MAGNET Field
- Make sure you have all codes to match your needs in the Autodesk Point Layout model
- Export your codes as a Topcon XML (*.xml) Code Library
Note:
Use guidelines in "MAGNET Field: Creating a Field Code Library“
Importing Codes into Autodesk Point Layout
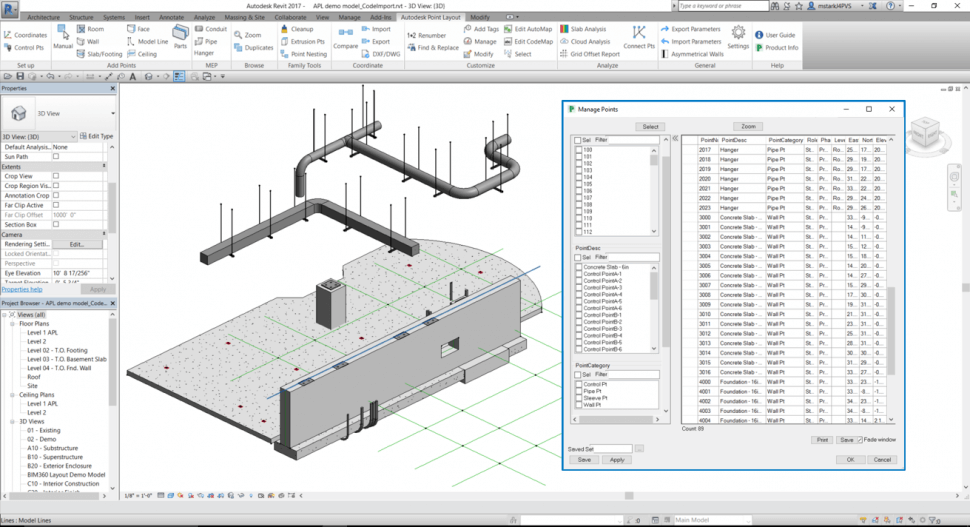
- Create your points based on CAD / BIM entities by using the Autodesk Point Layout add-in in AutoCAD, Navisworks or Revit
-
In this example we have:
- Control points
- Hanger points
- Slab points
- Wall points
- Sleeve points
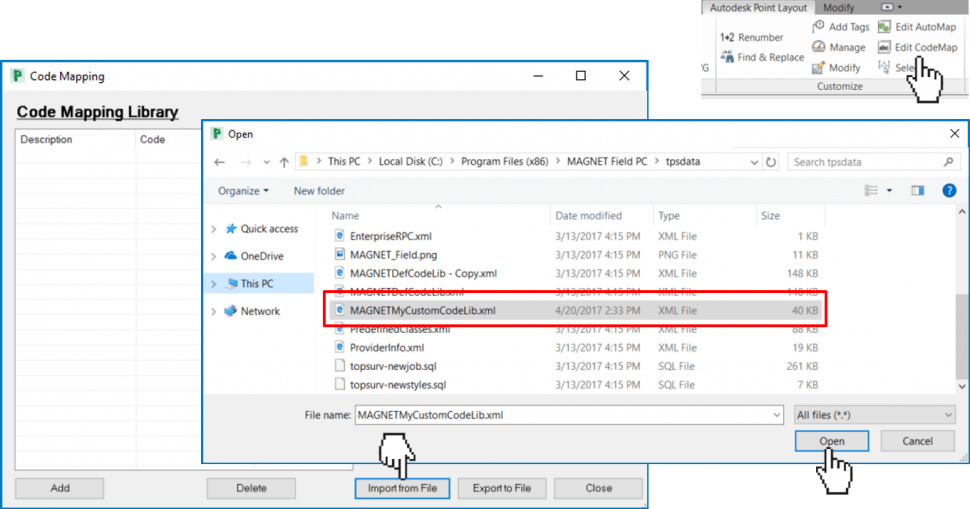
- Select Edit CodeMap in the Customize group
- Select Import from File in the Code Mapping window
- Browse to your exported Topcon XML (*.xml) Code Library
- Select Open
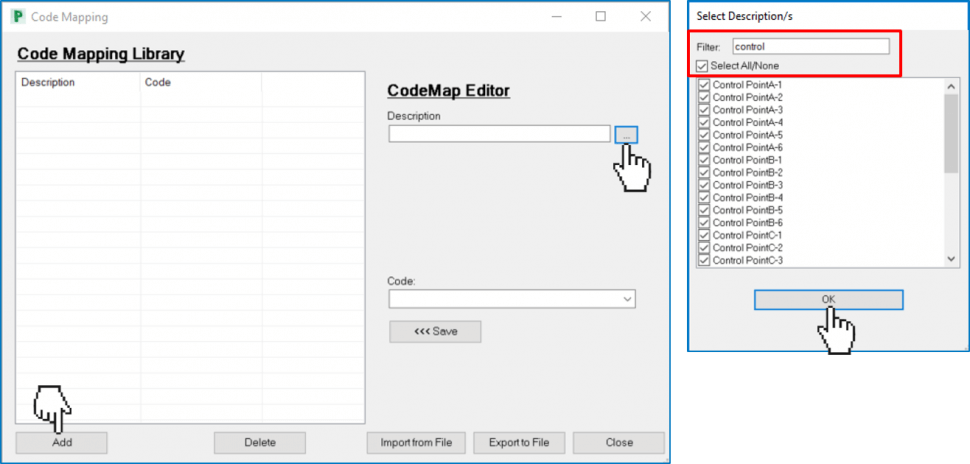
- Select Add in the Code Mapping window
- Select the ellipsis to get a selection window of all available APL points in the model
- Use the Filter & Select All/None option to select a specific portion of points (for instance just control points)
- Select OK
- Select the matching MAGNET Code in the drop-down list
- Select Save to populate the matching codes into the Code Mapping Library
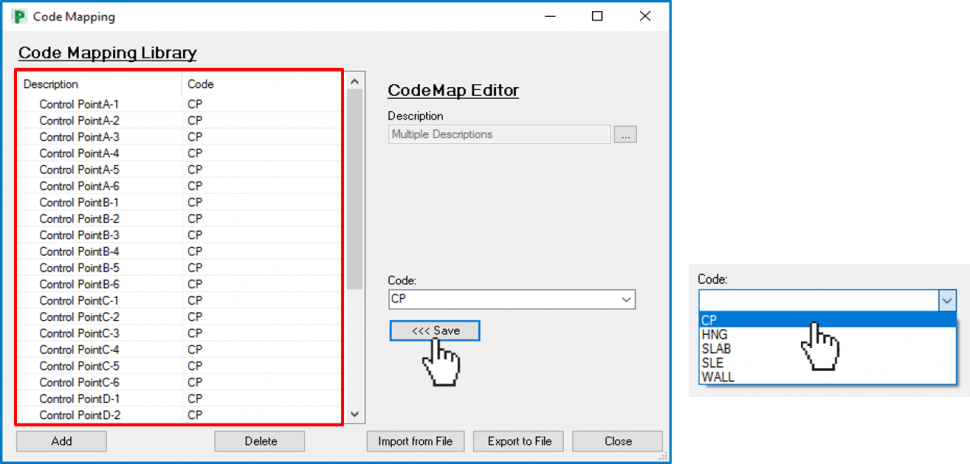
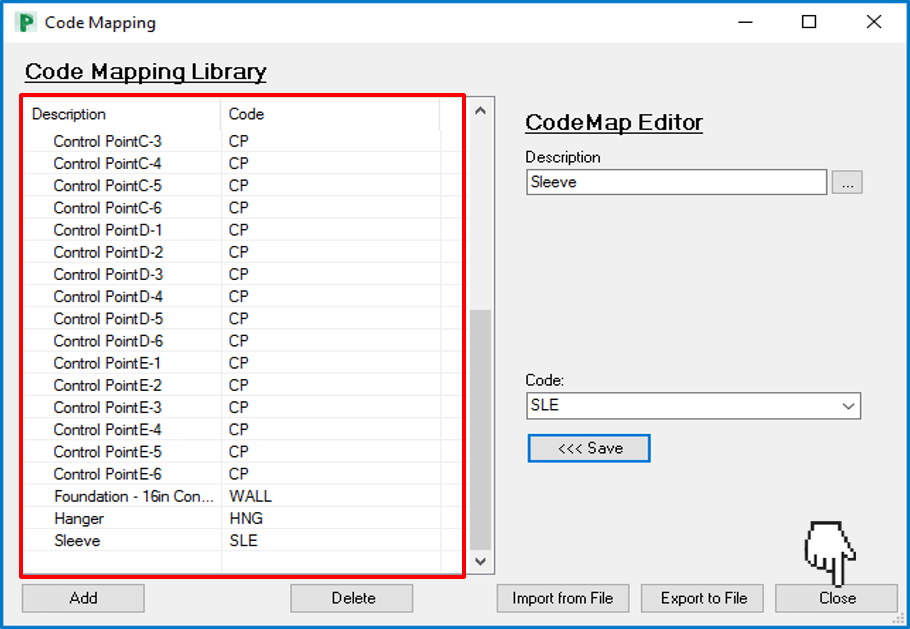
- Match all your APL point descriptions with MAGNET Codes and Save them into the Code Mapping Library
- Select Close
Exporting Points out of Autodesk Point Layout
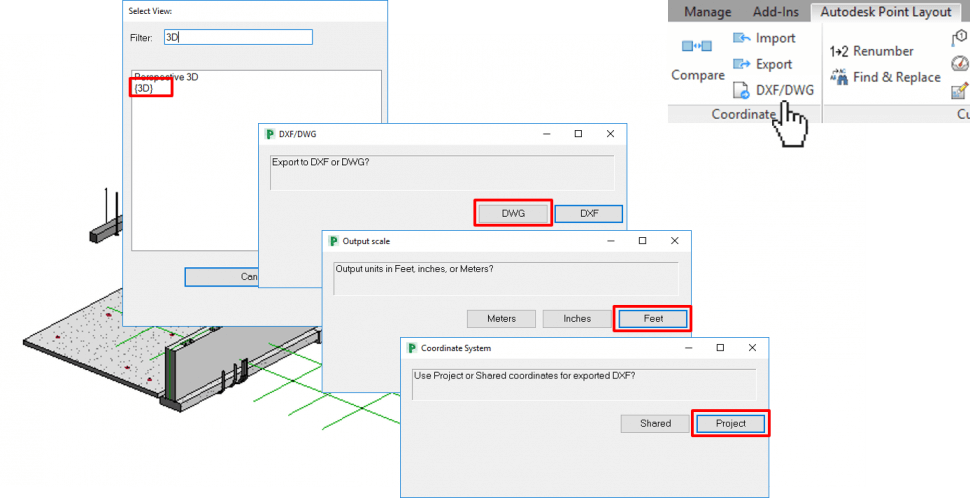
- Select DXF/DWG in the Coordinate tab
- Select the {3D} view
- Select DWG/DXF (DWG)
- Select your Output Scale (Feet)
- Select your Coordinate System if necessary (Project coordinates)
- Specify a File Path and a Name for the DWG
- Select Export in the Coordinate group
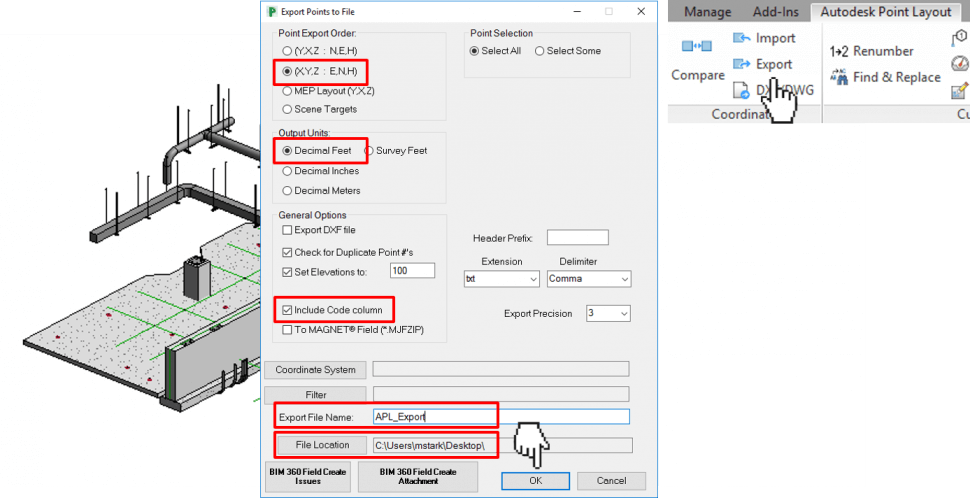
- Specify your Point Export Order (X,Y,Z)
- Specify your Output Units (Decimal Feet)
- Check Include Code column
- Define a Export File Name and a File Location
- Select OK
