Tilt Offset
- Place instrument on a stable tripod
- Level the instrument
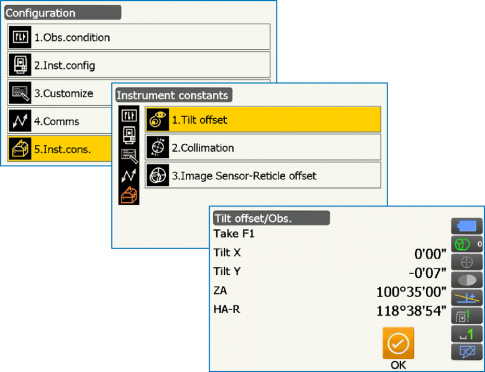
- Go to Top view by pressing the ESC key twice from the OBS screen
- Select Configuration and select 5. Inst. Cons.
- Select 1. Tilt offset
- Wait for instrument to stabilize and if necessary level the instrument until values are within 10” from the center
- Press the OK button
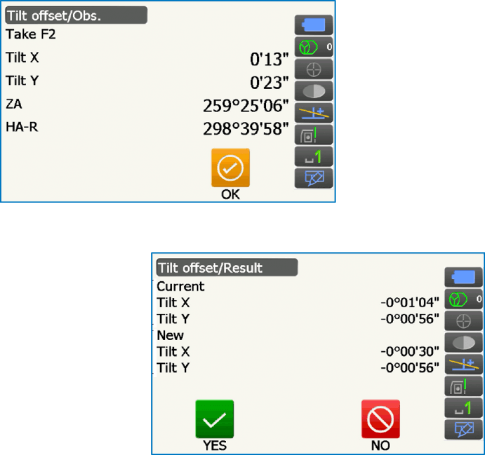
- Instrument will turn 180 degrees (HA-R and ZA).
- Allow for instrument to stabilize
- Press “OK” to measure values for the new position
-
Current and New values are then displayed
-
If the difference between new and current values:
- Is less than 1’ : Press the Yes button to finish calibration and to accept the new values
- Exceeds 1’ : Repeat process
- If the difference of new and current values is still above the 60” after repeating the process, contact your Topcon Dealer
-
If the difference between new and current values:
Collimation
- Place the instrument on a stable tripod
- Level the instrument
- Place or find an observable target over 300ft away
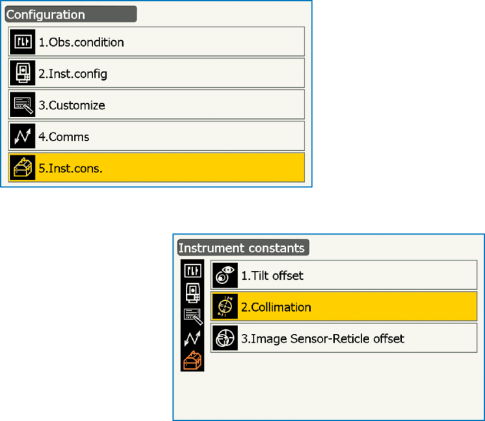
- Select Configuration and select 5. “Inst. Cons.”
- Select 2. Collimation
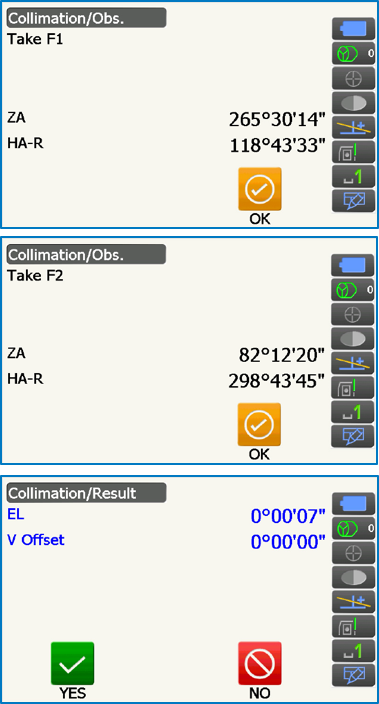
- Sight the target from the Face 1 position, and place the center of the cross hairs on the center of the target, manually.
- Press the OK button to accept the HA and ZA, then instrument will turn 180 degrees Hz and Vt
- Sight the same target again from Face 2
- When ready to accept the HA and ZA for Face 2, press the OK button
- The Collimation Result screen will then display the angular difference obtained from the observations
- Press YES to accept the values and use as the new constant
- Press NO to disregard
Reticle Offset
- Place the instrument on a stable tripod
- Level the instrument
- Place prism 300ft (100m) away
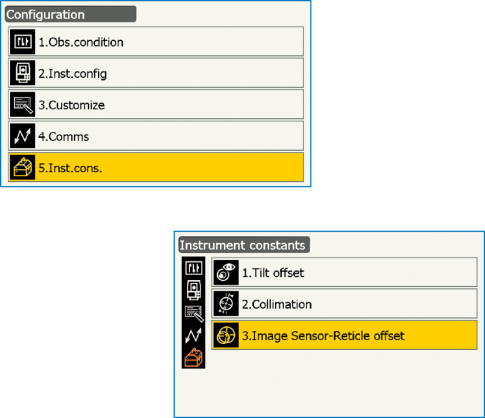
- Select Configuration and select 5. “Inst. Cons.”
- Select 3. Image Sensor – Reticle offset
- Sight the target on the face 1 position and place the center of the cross hairs on the center of the prism manually.
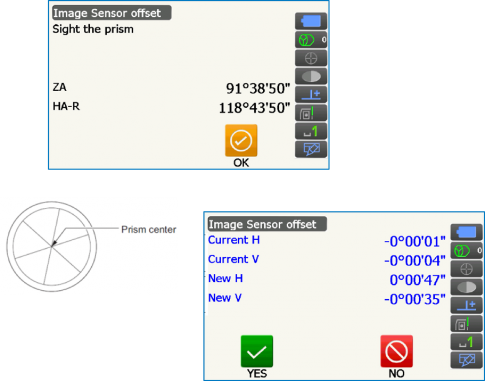
- Press OK button. Instrument will proceed to measure the reflection emitted by the prism, and will measure the returning light from the reticle.
- The New and Current Values will display.
- Press YES to accept new values.
- It is recommended to repeat process to accurately establish the trend for the field conditions in the moment.
