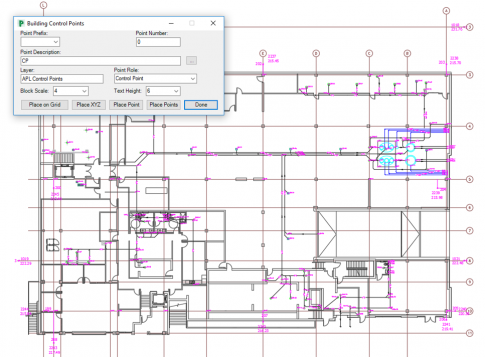
Creating points in APL
- Use APL functionality to create points
-
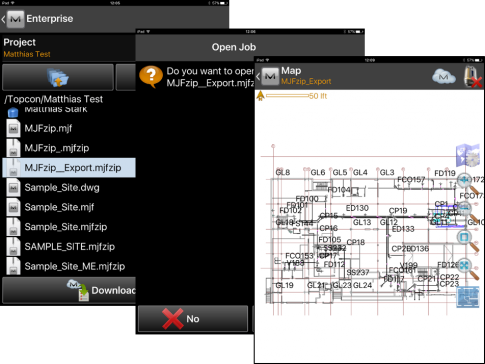
Make sure every APL point is on a dedicated Layer starting with "APL ...“
Data preparation for Export
Option 1
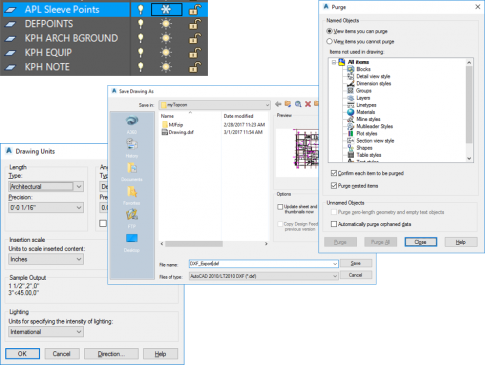
- Freeze all APL Layers
- Explode remaining entities (make sure MTEXT, POLYLINES, DIMENSIONS and other AEC OBJECTS are exploded completely) → EXPLODE
- Delete ELLIPSIS, if included
- Unfreeze all APL Layers
- Purge the drawing → PURGE
- Save the drawing as DWG
- Save the drawing as DXF version 2010
- Check units of your drawing → UNITS
- Close DXF drawing and open DWG
Option 2
- Make a copy of the drawing
- Delete the APL points in the copy
- Delete ELLIPSIS if included
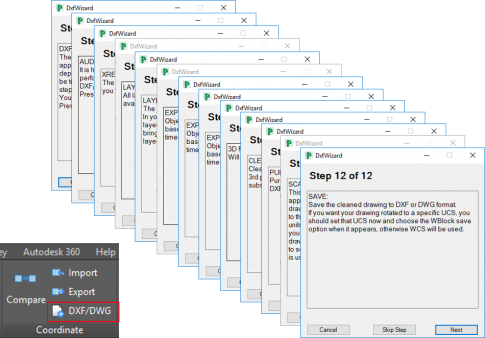
- Click on DXF/DWG located under the Coordinate group
-
APL will guide you through a 12 step DXF conversion process
-
Conversion will change the units from inches to feet
-
Make sure you export a DXF
Note:
The 12 step DXF conversion will burst / explode blocks including the APL point attributes. That's why you create a copy of the drawing.
Exporting points from APL
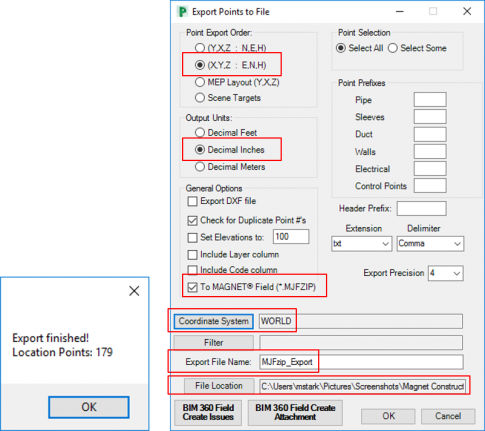
- Select Export located under the Coordinate group
- Select (X,Y,Z : E,N,H) as Point Export Order
- Specify the Output Units
- Make sure To MAGNET Field (*.MJFZIP) is checked under General Options
- Select Coordinate System if available
- Specify an Export File Name
- Select the File Location for the export
- Select OK
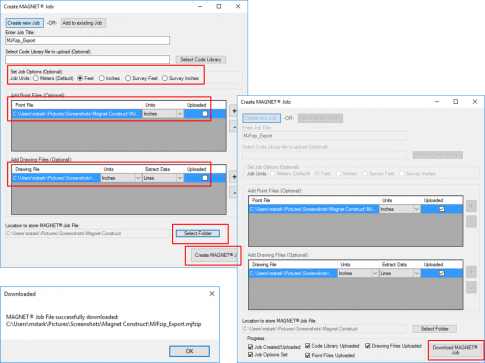
- Select Yes, I want to continue in the Usage Agreement window
- Select the Job Units
- Make sure Units of Point File match the units of your former point export
- Add Drawing File and select your DXF
- Make sure Units of Drawing File match the units of your DXF drawing
- Set Lines for Extract Data
- Select the Location to store MAGNET Job File
- Select Create MAGNET Job
- The Topcon web service will convert the data
- Select Download MAGNET Job
Transferring points to MAGNET Construct
Option 1
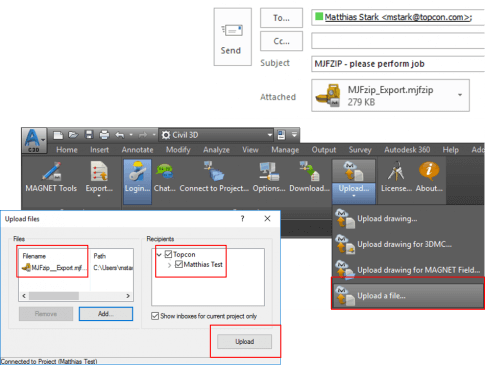
- Email the MJFZIP file to the responsible field person
Option 2
- Upload the MJFZIP file to MAGNET Enterprise
- Use the web application or
- Use the Topcon ribbon in AutoCAD and upload the file to your appropriate project
Importing points into MAGNET Construct
Option 1
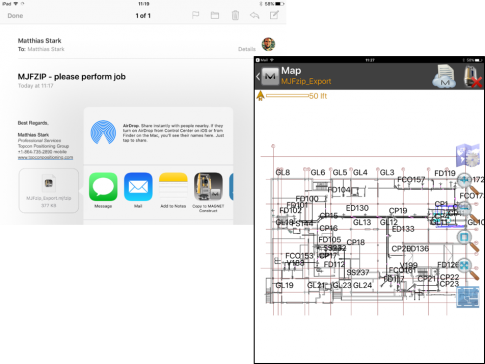
- Open the email on your mobile device
- Push and hold the MJFZIP file icon until further options appear
- Select Copy to MAGNET Construct
- MAGNET Construct will open and upgrade the job file automatically
- Select Yes to keep a copy
- Select OK
- Select the HOME button to display the Map screen
Option 2
- Open MAGNET Construct on your mobile device
- Go to Cloud and Exchange
- Go to Setup Connection
- Login to MAGNET Enterprise
- Got to Connect to Project
- Select your appropriate Project
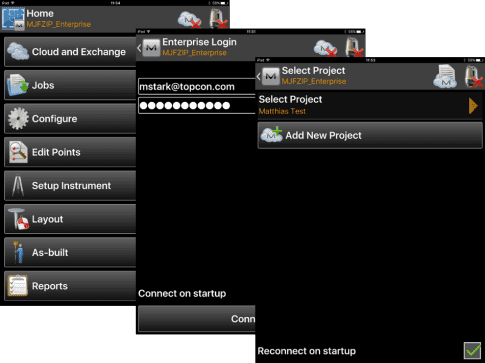
Option 2
- Select the MJFZIP file
- Select Download
- Select Yes to open the MJFZIP file
- Select Yes to keep a copy
- Select OK
- Select the HOME button to display the Map screen
