Creating Title Blocks
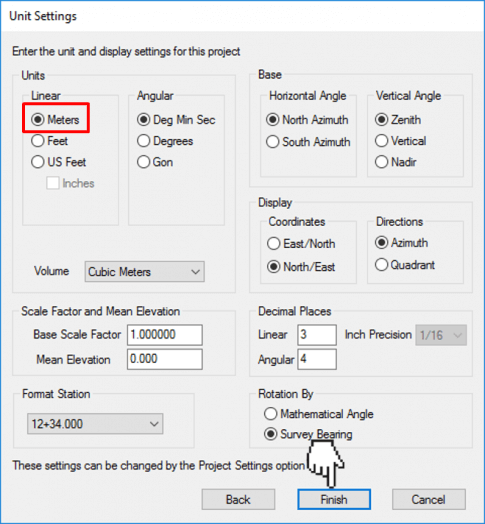
- Create a new MAGNET Office Project and set Project Units to Meters
- Click Finish
Note:
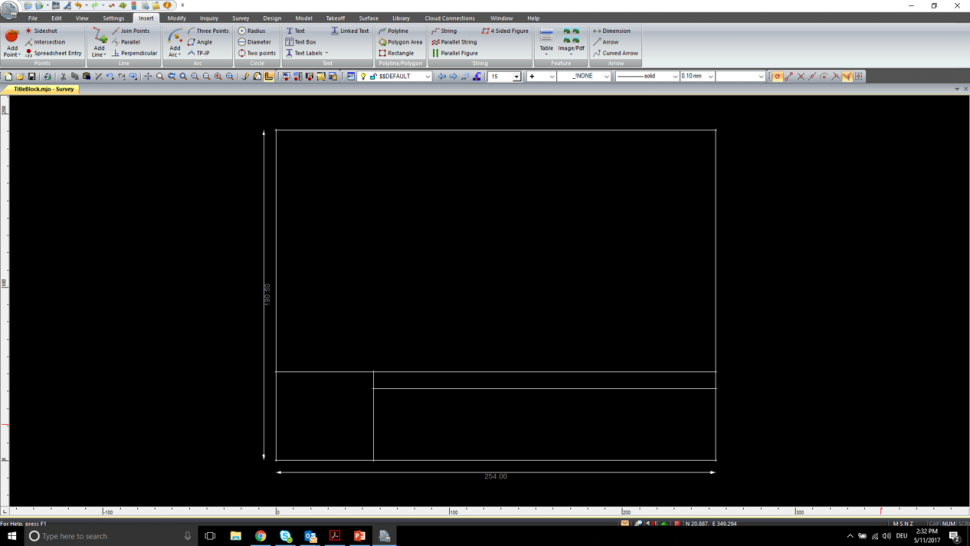
- Title Block has to be created in Millimeters
- Consider Margins
- Example: 8 1/2" x 11" sheet equals 215.9 x 279.4 mm
- 1/2" margin equals 12.7 mm
- Page size then equals 190.5 x 254 mm
- Create lines representing the page size and further sub areas for title block information
- Scale lines to be 1mm = 1 m
- Start at 0,0 for the lower left corner
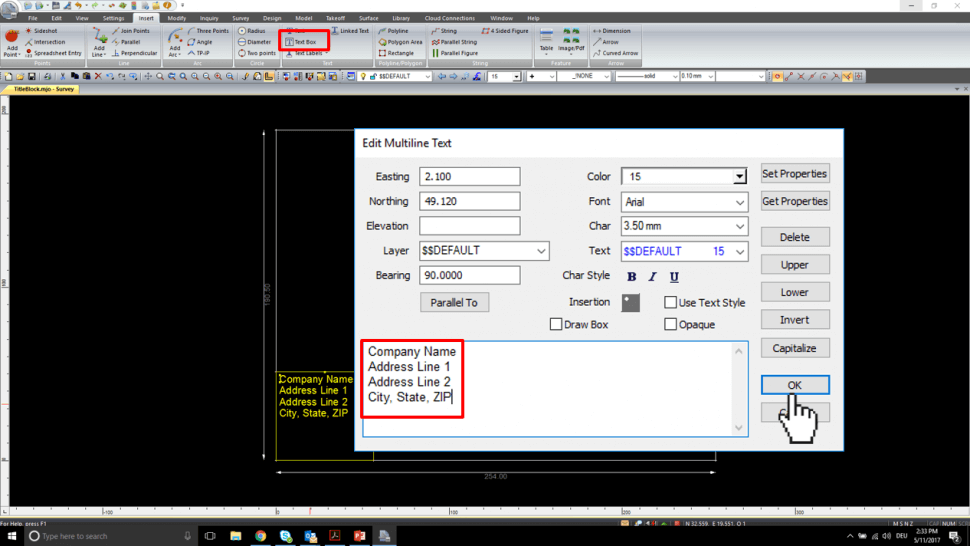
- Add text objects like company information to your title block
- Go to the Insert tab / Text and draw a Text Box
- Hit ESC and double click the text box to add information
- Hit OK
Note:
Text in text boxes will be fixed and cannot be changed after inserting the title block
- Add pictures like a company or project logo to your title block
- Go to the Insert tab / Feature / Image/PDF and insert a Background Image
- Browse to the logo path
- Select and click Open
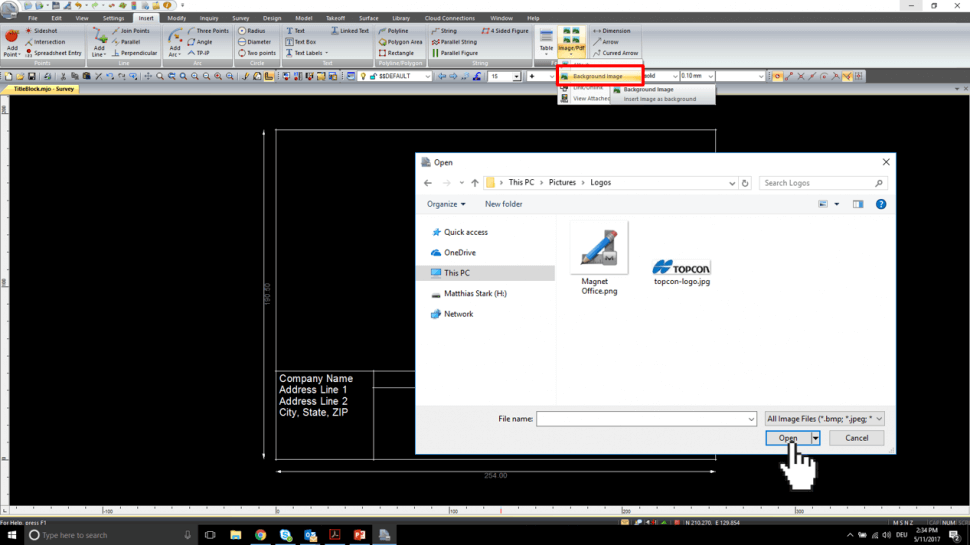
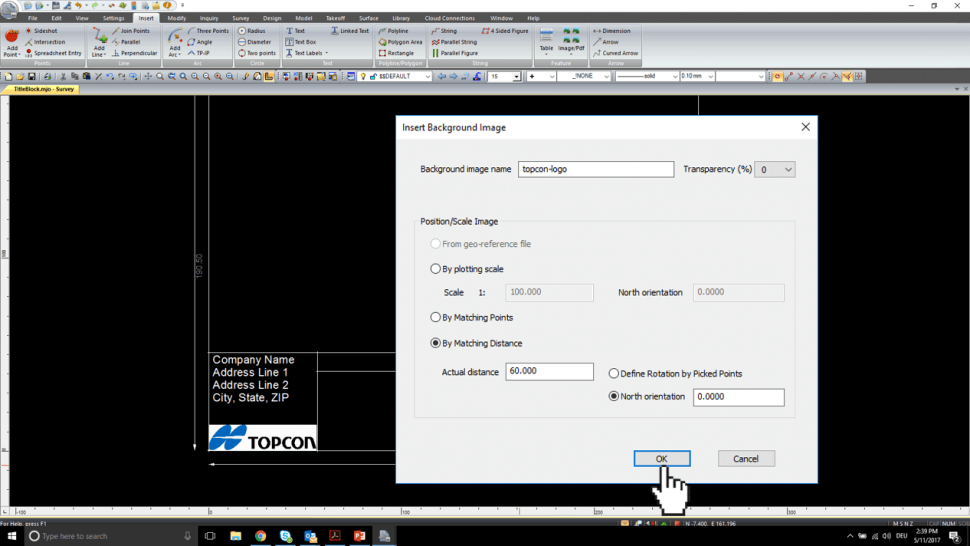
- In the Insert Background Image dialog use on of the Position/Scale Image options
- Hit OK
- Place image on the title block
- Add attributes to be populated automatically into the title block
- Go to the Insert tab / Text / Text Labels and select Keyword from the drop-down list
- Select a Keyword
- Hit OK
Note:
Keywords visualize the information from the Project Details in Project Settings
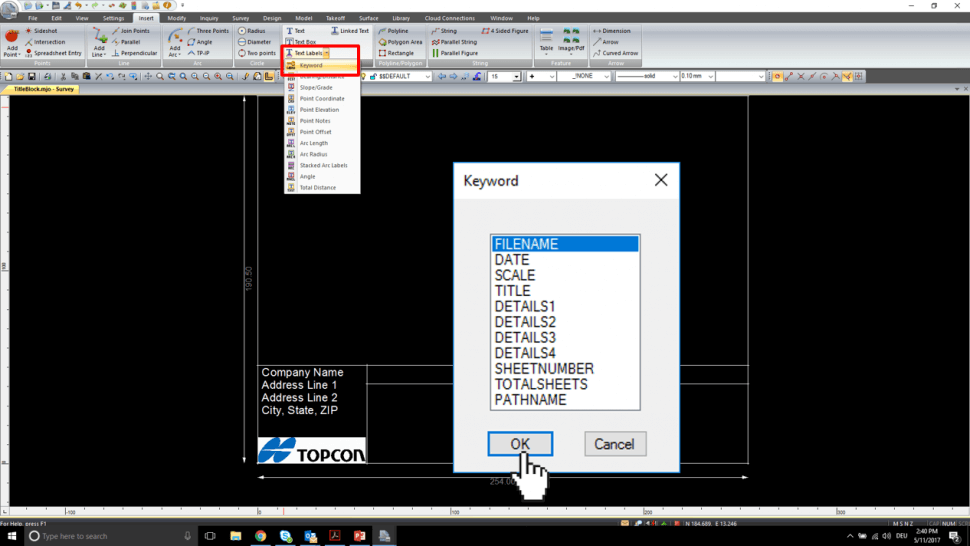
- Place Keyword on title block and hit Enter to accept location
- Place the next Keyword
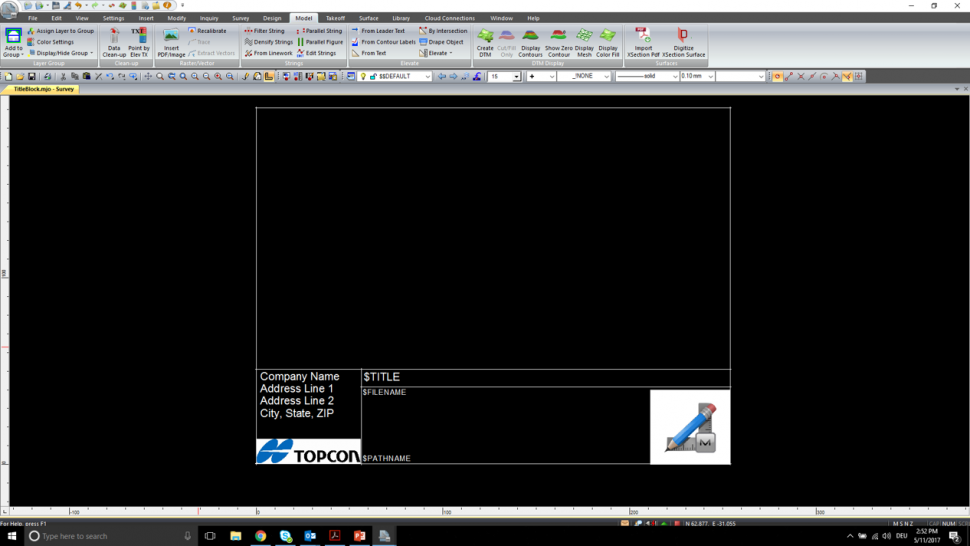
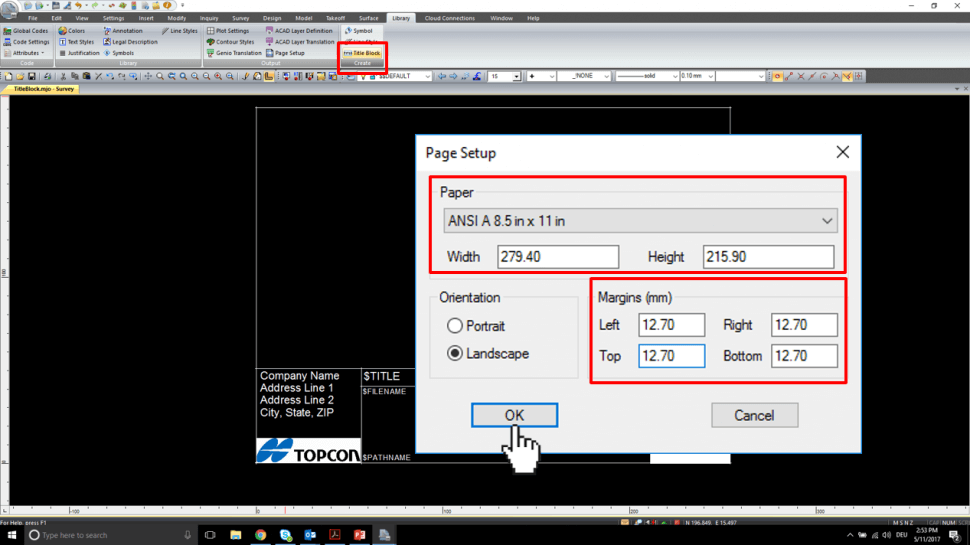
- Go to the Library tab / Create / and click Title Block
- Make sure the Page Setup matches your desired Paper and Margin settings
- Hit OK
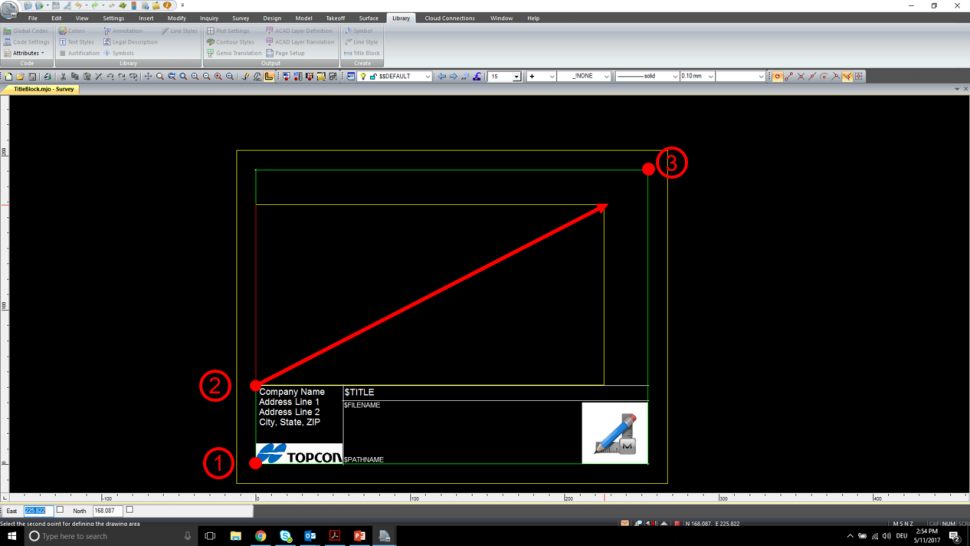
- Position the preview sheet on the lower left point of your title block (1)
- Select the first point of the plot window (2)
- Select the second point of the plot window (3)
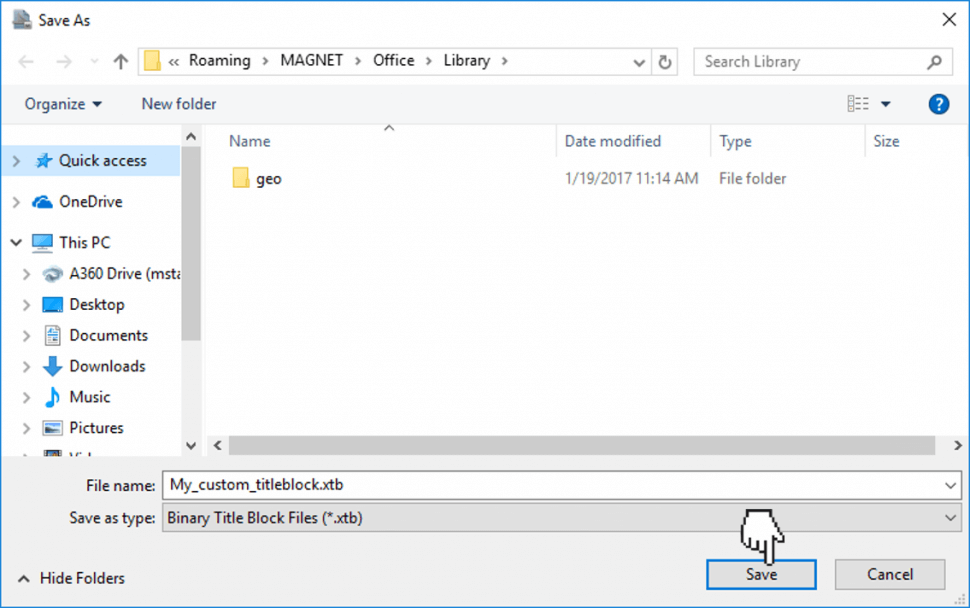
- Save the title block as a *.xtb file type
- Hit Save
Note:
Default path for a title block: %appdata%\MAGNET\Office\Library
