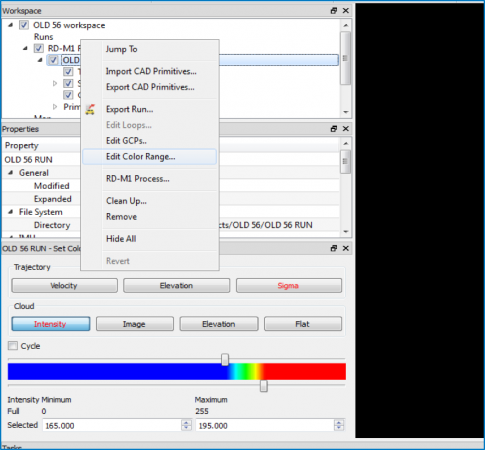
Color Settings
- Right-click on run name
- Select Edit Color Range
- Select Intensity
- Set maximum to 195
- Set minimum to 165
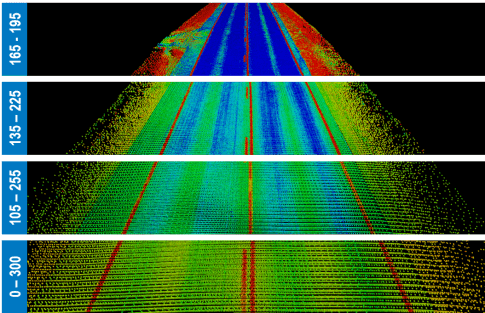
Color Settings – Intensity
- Signal return
- 0 – 300
- Mean ~ 180 (60%)
- Use to highlight features
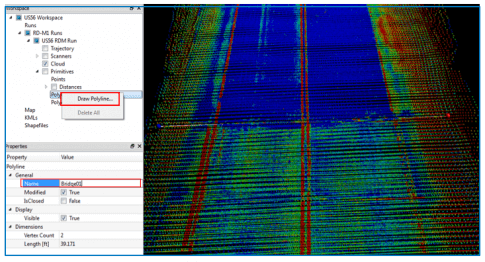
Create Polylines – Draw Polyline
- Expand Primitives
- Right-click Polylines
- Select Draw Polyline…
- Ctrl + Select in 3D view
- Name in Properties
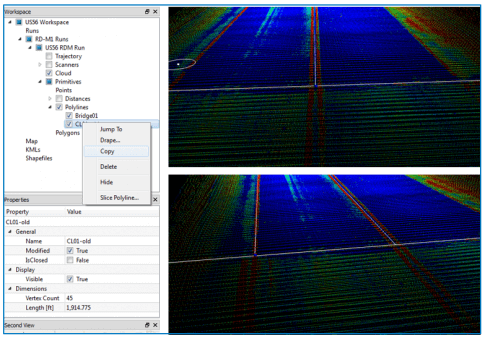
Create Polylines – Copy Polyline
- Right-click Polyline Name
- Select Copy
- Ctrl + Select Point Cloud
- Copies Direction and Distance
- Not Parallel
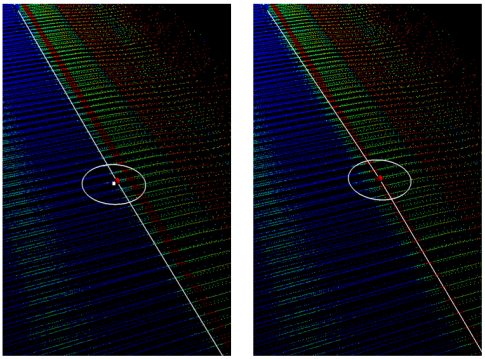
Create Polylines – Move Vertex
- Select polyline in workspace
- Select blue sphere at the vertex
- Sphere turns red when selected
- Select and drag
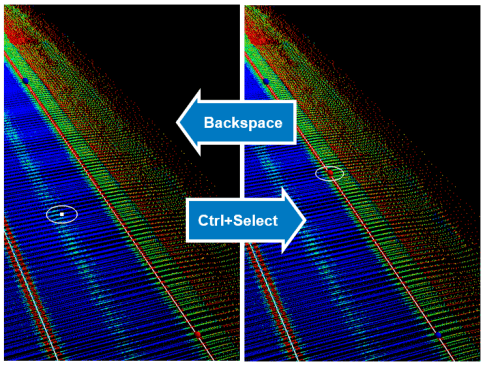
Create Polylines – Add or Remove Vertex
-
To Add
- Select Previous
- Ctrl + Select
-
To Remove
- Select Vertex
- Backspace
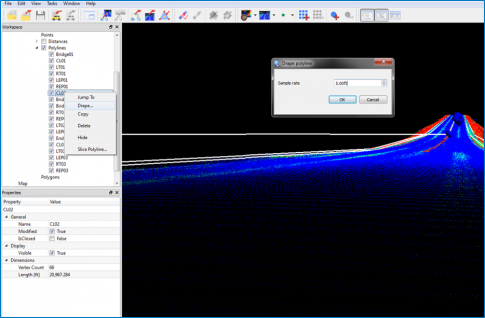
Create Polylines – Drape Polyline
- Right-click in workspace
- Select Drape…
-
Enter Sample rate
- 3 – 5 feet
- 1 – 1.5 meters
- Match later for cloud decimation
- Select OK
- Uses elevation from nearest point in the cloud
- Keeps original and adds suffix -old to the name
- Creates draped polyline at the bottom of the list
Create Polylines – Tips for Success
-
CL Shortest
- Keep the centerline shorter than the other polylines. Design stationing is based off of centerline in MAGNET Office.
-
Break at PC/PT
- Create new polylines when changing from tangents to curves and back. Easily joined in MAGNET Office.
-
Drape in Order
- Drape polylines in station order. Points are exported in order as displayed in the workspace.
-
Copy Data Folder
- Copy data folder before deleting -old polylines. No backup or restore in Mobile Master Office
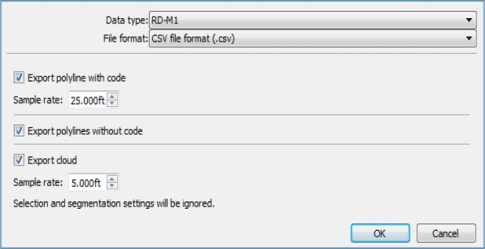
Export RD-M1 Files
- Open File Menu
- Select Export Run
- Choose… destination folder
- Add… RD-M1 data type
- Choose… project coordinate system
- Select OK to export files
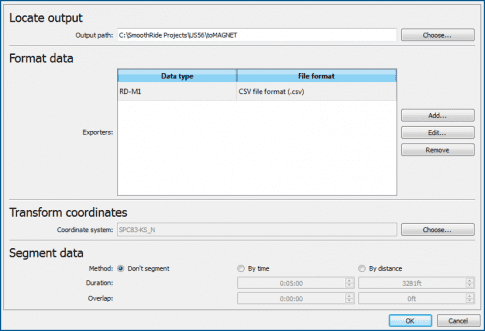
Export RD-M1 Files – Edit RD-M1 Data Type
- Three CSV Files
- Always named the same
-
Polyline with Code
- Sample Rate for Designing
-
Polyline without Code
- Sample Rate from Drape
-
Decimated Cloud
- Same Rate as Drape
