The following steps apply to the MC-i3:
- Remove the eight (8) retaining screws from the base of the MC-i3.
- Remove the base.
NOTE: When working with multiple MC-i3's at one time, be careful not to mix bases as the unit's serial number and other important information is marked on the label affixed to the base.

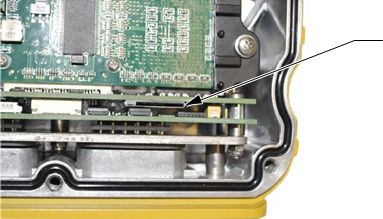
- Insert the SIM card into the SIM card slot.

- Reinstall the base and the eight (8) retaining screws using Blue Loctite and torque to 12 in-lbs.
NOTE: Failure to tighten all screws to the recommended torque may lead to moisture or dust entering the MC-i3.
Information needed before configuration:
- MC-i3 Serial Number
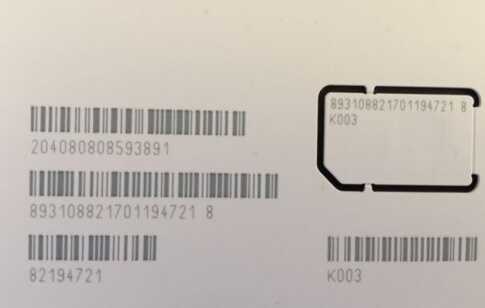
- ICCID Number from Topcon SIM card (19 digit number that starts with 8931)
- Topcon SIM card installed in the MC-i3

Connecting to the MC-i3:
There are multiple ways to connect to the MC-i3:
- QTWeb on a GX-60
- PC web browser (Programming cables 1001270-01 and 1001269-01 required)
- MCXConfig on a GX-55
Configuring Ethernet Adapter:
The process for connecting on a GX-60 and a PC are virtually identical.
- You must configure the Ethernet adapter settings on a GX-60 and PC to connect to the MC-i3 web interface.
-
For the GX-60/Windows XP:
- Start > Settings > Control Panel > Network Connection > Local Area Connection > Properties > Internet Protocol (TCP/IP) > Properties.
-
For Windows 7 and up:
- Start > Control Panel > Network and Sharing Center > Change Adapter Settings > Right Click > Properties > Internet Protocol Version 4 (TCP/IPv4) > Properties.
- IP Address: 192.168.0.10
- Subnet Mask: 255.255.255.0
- Default Gateway: 192.168.0.1
- Preferred DNS server: 192.168.0.1
NOTE: MCXConfig is a standalone application for the GX-55. Editing the network adapter settings is not required.

Connecting to the MC-i3:
-
Open QTWeb on the GX-60 or any web browser on a PC and enter the following address:
- 192.168.0.1
- For a GX-55, open MCXConfig.
-
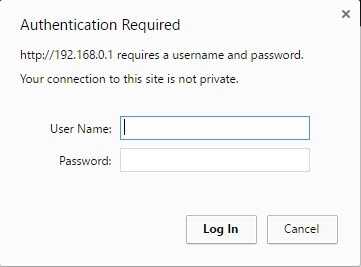
Enter the following credentials on the login screen:
- Username: admin
- Password: admin
- Select Log In

Configure the MC-i3 Settings:
- Under Ports, select GPRS
-
Verify/Change the following:
- Function: GPRS Dialup
- APN: m2mc.tierra
- Username: WAP@CINGULARGPRS.COM
- Password: CINGULAR1
- Use SIM PIN: Unchecked
- Allow Roaming: Checked
- Select Save