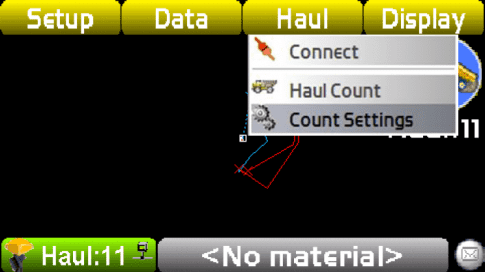
Access Count Settings Menu
- Press Topcon button, if necessary, to access on-screen menu
- Select Haul
- Select Count Settings

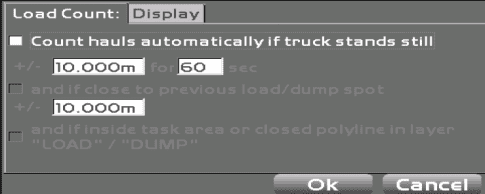
Auto-Load/Dump Logic Choices
- Loads can be controlled via manual interaction using the Load/Dump icon on the main screen
- Alternatively, various criteria can be established to automatically trigger a Load or Dump event

Lack of Movement
- Check this box and select distance and time variables that will trigger an automatic Load/Dump event
- Due to the low-grade GNSS patch antenna, positional measurements may vary by multple meters.
- Also keep in mind that external influences such as traffic or railroad crossings may trigger a Load/Dump event if no other criteria is applied.

Near Previous Load/Dump Sites
- Check this box and select a distance that will trigger an automatic Load/Dump event
- **Please note that for this option to work, Load/Dump events/locations must already be recorded using other criteria or the manual Load/Dump button on the main screen. After Resetting the Load Counter, new positions must be established for this logic to function

Designated Load/Dump Areas
- When this option is selected, hauls will automatically be counted if the truck is within a task area or closed polyline that is named "LOAD" or "DUMP"
- Task areas can only be created and assigned within Sitelink
- A closed polyline can be created via the on-screen context (right-click) menu, which can be accessed by pressing the '>' button on your device, or holding down on the screen.

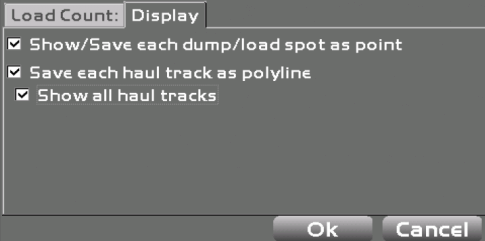
Display Tab
- Lists three options for displaying how hauls are displayed and stored.
- Select first checkbox if you would like to store a point at the location of each Load/Dump event and have it displayed on the screen as an 'X'.
- Select the second checkbox to show haul paths as a polyline (empty hauls in blue, loaded hauls in red)
- Optionally toggle the third checkbox to show only the current haul path, or all haul paths since last Reset.

- Current path (left)
- All paths (right)
