Installation /Setup
- Download the current version of MAVinci Desktop from the Topcon TotalCare website and install to the user’s PC.
-
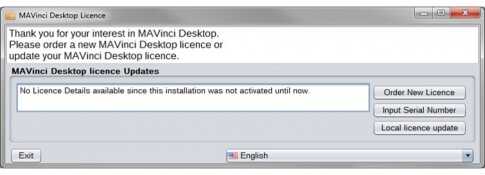
Once installed, open MAVinci Desktop and the MAVinci Desktop License window will appear.
- Note that this screen will only appear when MAVinci Desktop hasn’t been registered on the PC before.
- If the software is already registered, this screen will not appear and the software will open normally.
- Updates for registered versions are handled via an online update within the software.
- Select Order New License.
Installation/Setup
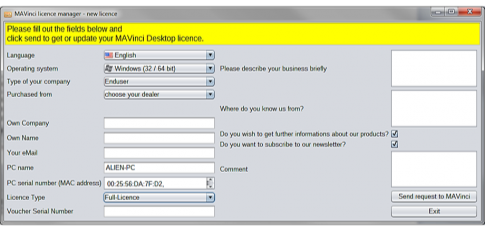
- On the MAVinci License Manager screen, enter in the requested information into all fields.
- Enter the Voucher Serial Number (if applicable).
-
Once finished, select Send request to MAVinci.
- Note – an Internet connection is required.
- Once the request has been submitted to MAVinci, select Exit and then close MAVinci Desktop.
- MAVinci will respond to the user via email with the serial number of the MAVinci Desktop License.
Installation/Setup
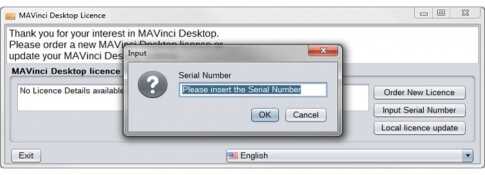
- Once the serial number of the MAVinci Desktop license has been received from MAVinci, open MAVinci Desktop on the user’s PC.
- Select Input Serial Number.
- Enter the serial number received from MAVinci.
- Select Ok.
- MAVinci Desktop will then open normally to the Welcome screen.
Software Updates
- On the Welcome menu, select About.
- To check for updates to the MAVinci Desktop application, select Search for online update under the MAVinci Desktop Update section.
- To check for updates to the MAVinci Desktop license, select Search for online update under the MAVinci Desktop license Updates section.
- If an update to a newer version is available for either, follow the onscreen instructions to update.
General Settings
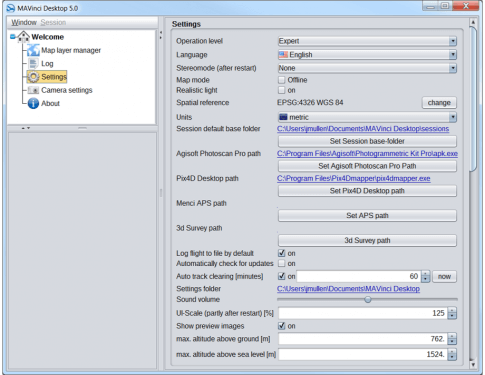
- On the Welcome menu of MAVinci Desktop, select Settings to open the Settings Panel.
-
All general software settings on the settings panel can remain at their defaults, except:
- Select the Operation Level as Expert.
- Select the Spatial Reference system to be used (default uses WGS84 coordinates).
- Select the units to be used as Metric or Imperial.
- Select the folder path for the MAVinci Desktop sessions.
- Select the folder path to AgiSoft, Pix4D, Menci, or 3D Survey post processing software (if applicable).
- For description of all the settings available on the settings panel, please refer to section 13.5 of the MAVinci user’s manual.
- The MAVinci user’s manual can be opened by selecting Window – Manual in English while in MAVinci Desktop.
Camera Settings
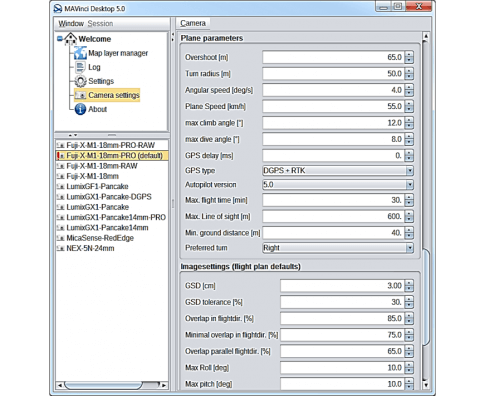
- On the Welcome menu, select Camera Settings to open the Camera Settings Panel.
-
From the list of camera profiles on the lower left side of the camera settings panel, select the following UAV camera payload:
- Fuji X-M1 – 18mm – PRO.
- Right click on the Fuji X-M1 – 18mm – PRO camera profile and select Set as Default.
-
On the right side of the camera settings panel under the plane parameters section, configure the following:
- Select the GPS type as DGPS + RTK.
- Select the Autopilot version as 5.0.
- Leave all other settings on the Camera Settings Panel at their defaults.
- Right click on the Fuji X-M1 – 18mm – PRO camera profile and select Save Changes.
- For description of all the settings available on the camera settings panel, see section 13.6 of the MAVinci user’s Manual.
