NetGear Port Forwarding
Netgear routers include a very basic firewall that helps protect your home network form unwanted access from the internet. Since this firewall blocks incoming connections you may need open a port through it for certain applications. This process of opening a port is frequently called a port forward, since you are forwarding a port from the internet to your home network.
The basic process to open a port is:
- Setup a static ip address on either your computer or device that you want to forward a port to.
- Login to your Netgear router.
-
Navigate to the port forwarding section.
- Click the Advanced link.
- Click on Server.
- Create a port forward entry.
These steps may appear to be difficult. It isn't! This simple How-To will guide you along the way
With any setup on a Hosts network it is important to know what the private LAN subnet may be. Typically, the default scheme is maintained but there may be times where it has been changed. This may or may not include the subnet and/or the default admin username and password. If the admin account has been changed, it is imperative to have this prior to gaining access to the router. During this presentation, we will assume the default subnet and admin accounts are used.
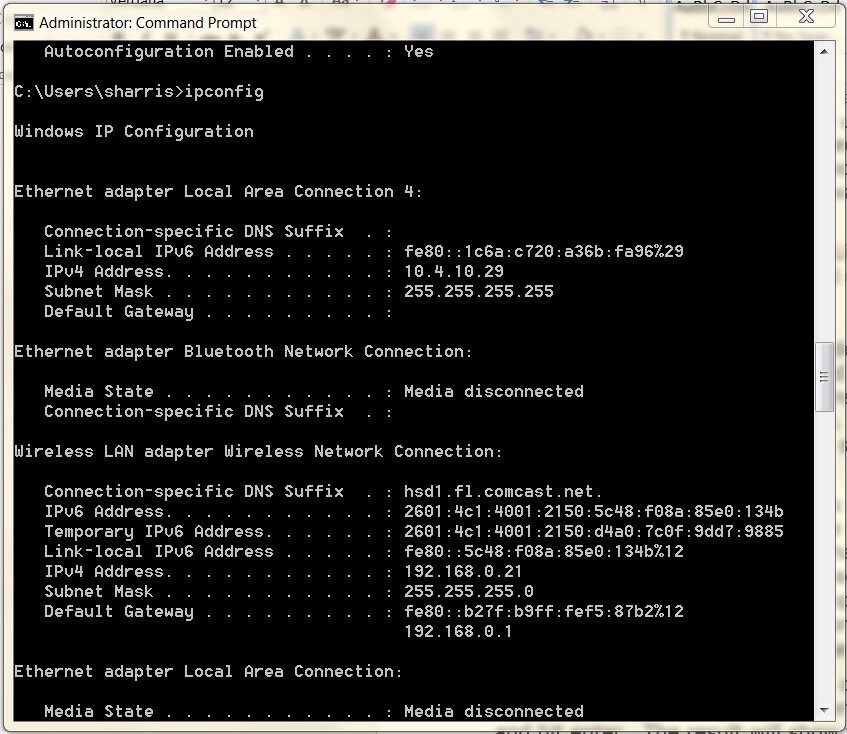
To determine the network subnet, connect your PC to the router and open the command prompt. From the prompt, type the command ipconfig /all and hit enter. The result will show the IPv4 address assigned to the PC, the subnet mask and the gateway address. The gateway address is the IP for the router and will be used to connect for edits to the routers firewall rules.
Step 1
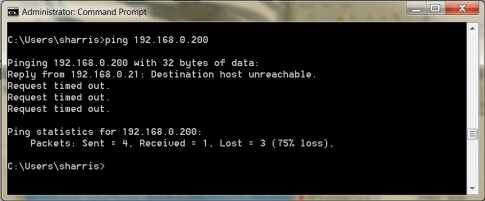
It is important to setup a static ip address in the GNSS Reference Station that you are forwarding a port to. This ensures that your ports will remain open even after it reboots. To find a vacant IP within the subnet, use the ping command from the command prompt.
Here we picked 192.168.0.200 randomly, getting no replies signifying there is no device in this subnet with this address. You are free to use it to configure the GNSS receiver. In the case of Netgear, the default subnet is 192.168.0.1. This is the subnet visible in the ipconfig reply
Step 2
It is time to login to the Netgear router thru what is called a web interface. It really doesn't matter what browser you use so go ahead and open up your favorite.
In your web browser, find the address bar. This is usually at the top of the page like the image shows.
In the screenshot you should see an address bar, erase the address you currently see in your address bar and replace it with the router's IP address. The Netgear router's default IP Address is: 192.168.0.1
Note: A Router's Default IP Address is also commonly called the Computer's Default Gateway.

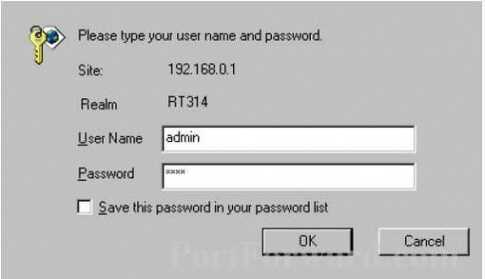
Once you have finished entering your router's IP address in the address bar click the enter button on your keyboard. A box with the router login should appear prompting for a username and password.
- The Default Netgear Router Username is: admin
- The Default Netgear Router Password is: password
Enter your username and password, and then click the Login button to log in to your Netgear router.
Step 3
Once logged into the router, we need to find the port forwarding section in your router. Here's how you do it. Starting from the first page in your router:
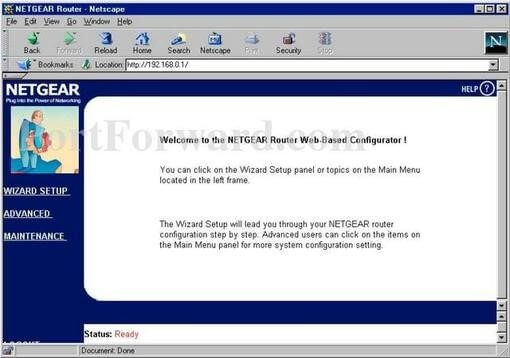
Click the Advanced link near the left of the page.
The menu links near the top of the page should change, showing new menu lonks. Click Server. This will navigate to a new page in the routers configuration, showing the port forward grid.
Step 4
Now we are ready to enter some vital info in your router. Since the default TCP port for most Topcon Reference Station receivers is 8002, this is what we will want to forward. However, there may be occassions where 8002 is not available. If this happens you will need to change the default port in the Topcon receiver to what port you are able to use.
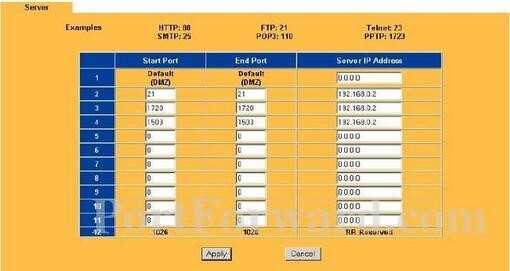
Notice, there are 2 items we need
- TCP port (8002)
- Receivers internal IP address (192.168.0.200)
Add both items to the Netgear config as shown.
When you're finished, click Apply near the bottom of the screen to save your changes.
