Network Troubleshooting
Reference Stations operate continuously. They are the 24/7 work horse of the Survey and Construction community. While they are built to last, there are times where they need attention. Failures generally fit into one of two categories; Hardware or IT. This Quick Guide will focus on networking and what we can do to remedy common issues. IT/Networking can fail in several places, either individually or all together.
The main networking components of a typical Reference Station Network are:
- Receiver
- Router
- Modem (if separate from router)
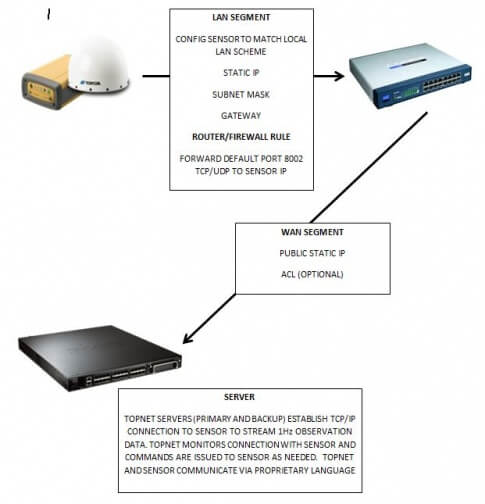
One of the most simple, and becoming more frequent issues, is a change in the IT configuration. The host may have switched internet service providers, or had to replace a router. Ask them! It will save time and frustration.
Regardless, if the IT component is suspected, then we need to dig into the issue to troubleshoot.
At a minimum, you should have:
- Laptop with TRU
- Serial "A" cable
- Ethernet cable
Items that are handy to have:
- Admin username and password to the router
- know the IP scheme
Step 1
First and foremost we need to access the SAME network device as the Reference Station receiver. There is no other way to troubleshoot the network config. Plug the laptop into the router with the ethernet cable. If available, the wireless network could be used since it tends to be in the same subnet as the wired interfaces.
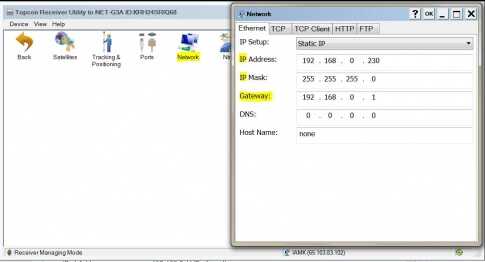
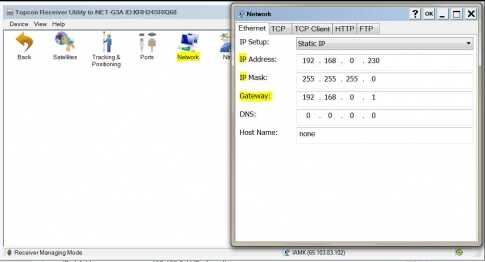
Connect to the receiver with the serial A cable and connect to the receiver with TRU. From the Receiver Settings icon, click Network. This will give you 3 things
- IP
- Subnet Mask
- Gateway
Step 2
The receiver's network configuration is available from TRU, and needs to match the internal network. To get the internal network configuration, launch the Command Prompt from Windows.
At the cursor type: ipconfig /all
This command will display the network config for all of your network connections. Scroll to the area that displays your connection type. Most likely it will be either
- Ethernet adapter Local Area Connection:
- Wireless LAN adapter Wireless Network Connection:
This section will give key pieces of information. The BOLD selection should match what was received from the receiver's network configuration. If not, then it is likely there has been a change in hardware.
IPv4 Address. . . . . . . . . . . : 192.168.0.11(Preferred)
Subnet Mask . . . . . . . . . . . : 255.255.255.0
Lease Obtained. . . . . . . . . . : Friday, July 14, 2017 4:53:58 PM
Lease Expires . . . . . . . . . . : Thursday, July 20, 2017 4:54:34 AM
Default Gateway . . . . . . . . . :192.168.0.1
Step 3
Let's assume the receiver config matched the router config. In the example image, the receiver has an IP of 192.168.0.230. From the Command Prompt, type ping 192.168.0.230. If the receiver is connected and the internal network is functioning, the ping command will issue replies
C:\Users\sharris>ping 192.168.0.230
Pinging 192.168.0.11 with 32 bytes of data:
Reply from 192.168.0.11: bytes=32 time=44ms TTL=128
Reply from 192.168.0.11: bytes=32 time=21ms TTL=128
Reply from 192.168.0.11: bytes=32 time=15ms TTL=128
Reply from 192.168.0.11: bytes=32 time=18ms TTL=128
Ping statistics for 192.168.0.11:
Packets: Sent = 4, Received = 4, Lost = 0 (0% loss),
Approximate round trip times in milli-seconds:
Minimum = 15ms, Maximum = 44ms, Average = 24ms
If the receiver responds with the following, it is a good bet that the receiver may have a bad ethernet port
C:\Users\sharris>ping 192.168.0.230
Pinging 192.168.0.230 with 32 bytes of data:
Reply from 192.168.0.11: Destination host unreachable.
Request timed out.
Request timed out.
Request timed out.
Ping statistics for 192.168.0.230:
Packets: Sent = 4, Received = 1, Lost = 3 (75% loss),
Ok, we ping'ed the receiver's IP, got a response but want to make double sure the receiver was responsible for the reply. It is HIGHLY possible that another device has been assigned the SAME IP address. The next trick is telnet. Again, from the Command Prompt, type telnet 192.168.0.230 8002. This syntax is straight forward. Telnet is the command, 192.168.0.230 is the receiver's IP address and 8002 is the default port for Topcon receivers. It is possible that 8002 has been changed to a different port due to limitations at the host site. If so, use that port instead. The telnet command should respond with
# NET-G3A receiver ready
# /par/rcv={id=KRH24SRIQ68,ver={main="4.7 Jun,15,2017 p4 ",board=E2G3_6}}
login:
If there is anything else in the telnet window, there is a good chance that another device is responding. It may be a good idea to change the IP of the receiver in TRU to verify.
Step 4
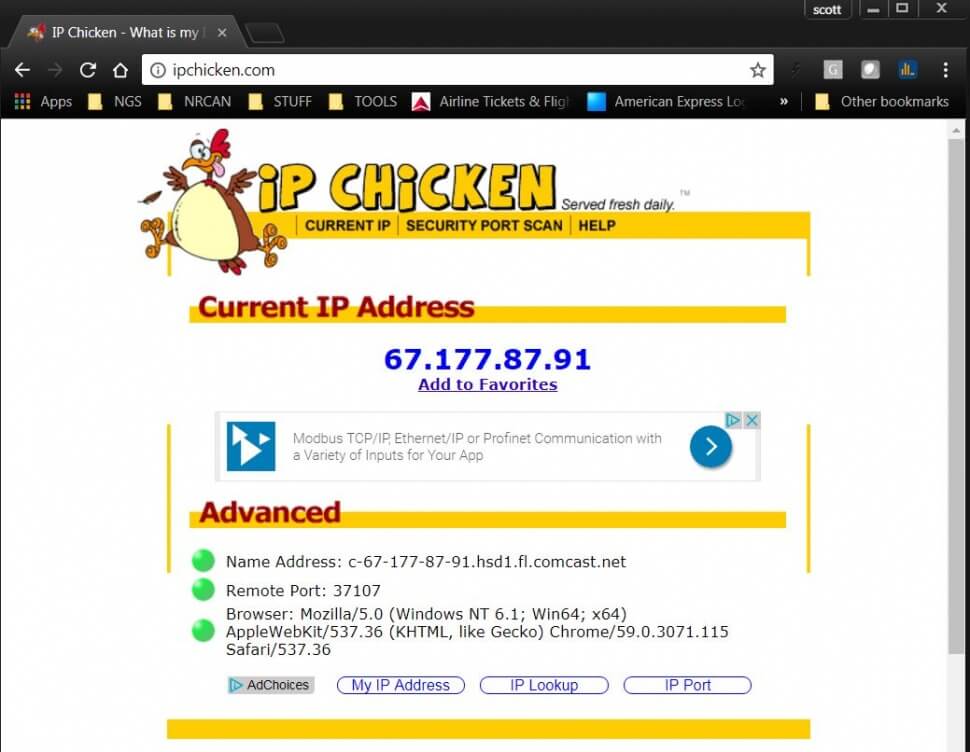
Assuming ping and telnet both respond identifying a Topcon receiver is on the other end, the next step is to determine IF there has been a change in the Public IP address. TopNET relies on this public address to connect to the receiver. If they don't match, then a connection can't be made. From the laptop open a browser, typically Internet Explorer, Chrome or Firefox. In the address bar type, ipchicken.com. This address will open a webpage that checks the public IP assigned to the host's router. If it matches what is set up in TopNET, GOOD. If not, then the new address needs to be entered into TopNET and tested. Hopefully, there is a solid connection.
Step 5
If the IP matches betwen ipchicken and TopNET, the only place left to look is the router/firewall. Most likely, the router may have lost the port forward configuration. Port forward quick guides are also availble as Quick Guides here.
Recall from the 1st part of this guide where we NEED the administrator login for the router? This is crucial. If access to the router is denied, then there is nothing else to do except call the Host's IT group.
Assuming the login is available, from a browser, type the router's IP address. It will be the same IP as the Gateway configured into the receiver. In this case it was 192.168.0.1. A login box will appear for the Admin credentials. Enter the username and password to login. Each brand of router has its own interface, but they are usually intuitive. For this exapmple, a NetGEAR router is being used.
Once access to the router is complete, click the Advanced tab at the top of the page. This opens the Advanced Setup menus on the left navigation pane. Expand the Advanced Setup menu to expose the Port Forwarding link
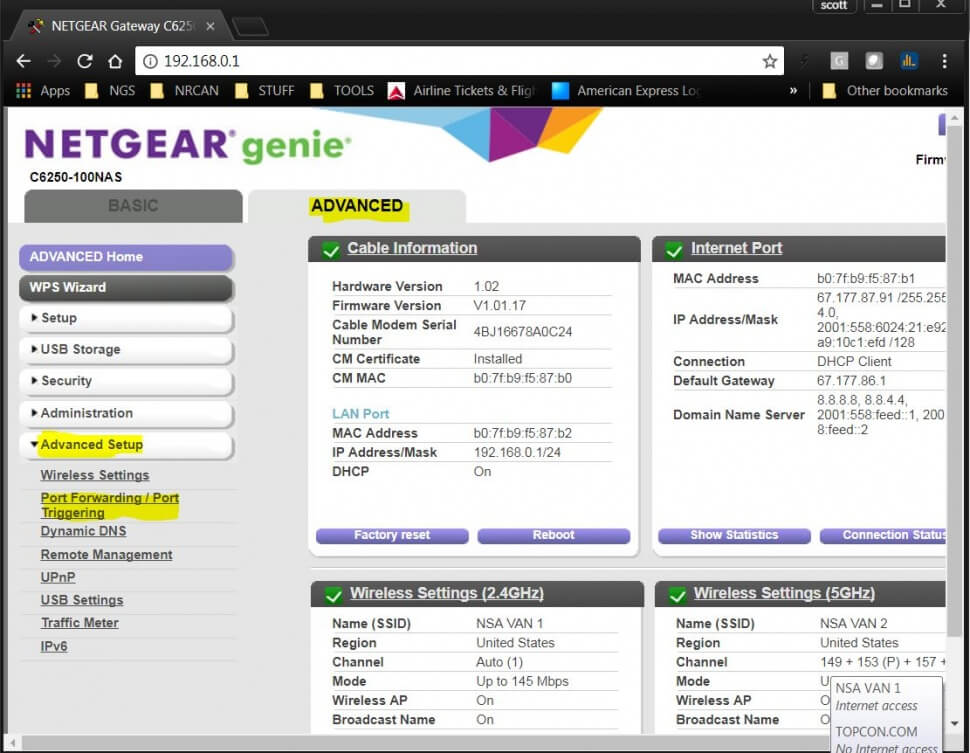
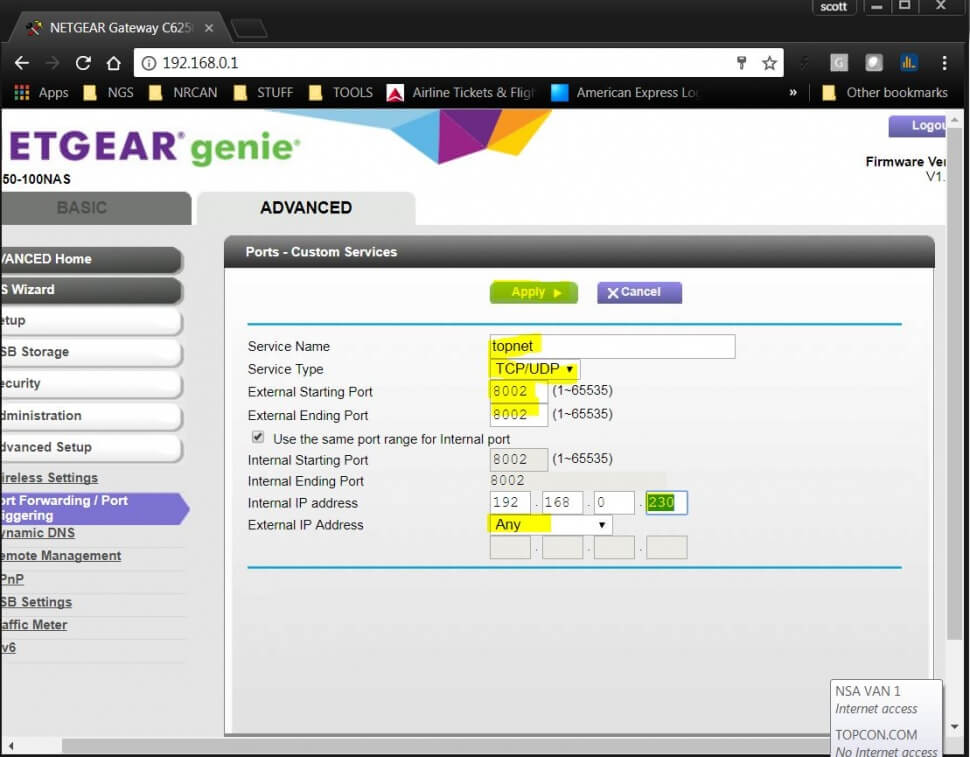
Notice there are no Port Forward rules in place. This is something that needs to be addressed. For a TopNET-enabled receiver, click the Add Custom Service tab
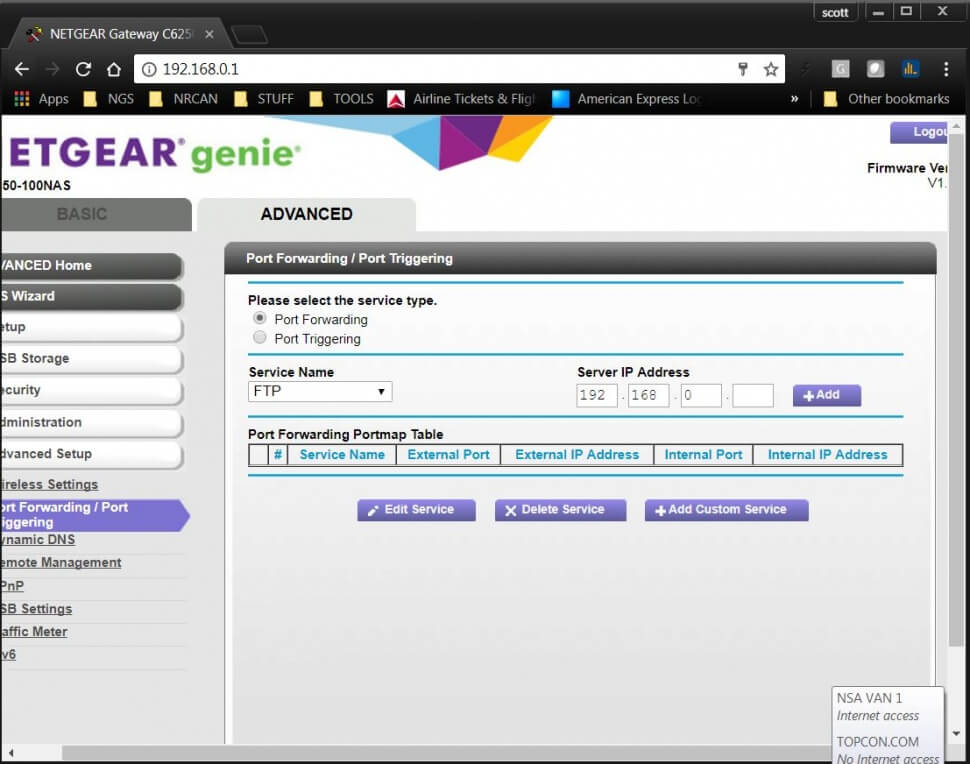
At the Custom Service page enter:
- Service Name - TopNET is easy to remember
- Service Type - Are the protocols, TCP and UDP are selected
- External Ports - 8002 or another port if the receiver was moved from the default
- Internal IP Address - What is configured for the receiver
- Click Apply
- Done
After going through these steps, hopefully the site is back online
