GCP Matching - Falcon 8/8+/SIRIUS BASIC
- After all the initial AT processing for a given project has been completed, to improve the absolute accuracy of the data, ground control point (GCP) matching must be performed.
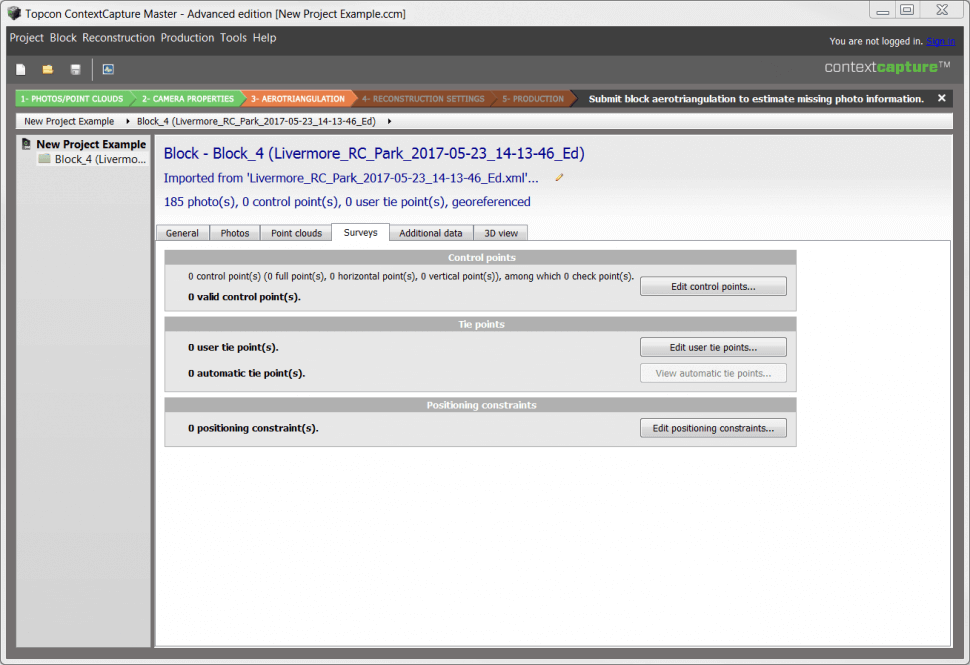
- Select the AT processed photo block (or merged block) from the left side of the screen and select the Surveys tab.
- Select Edit Control Points to open the Control point editor screen.
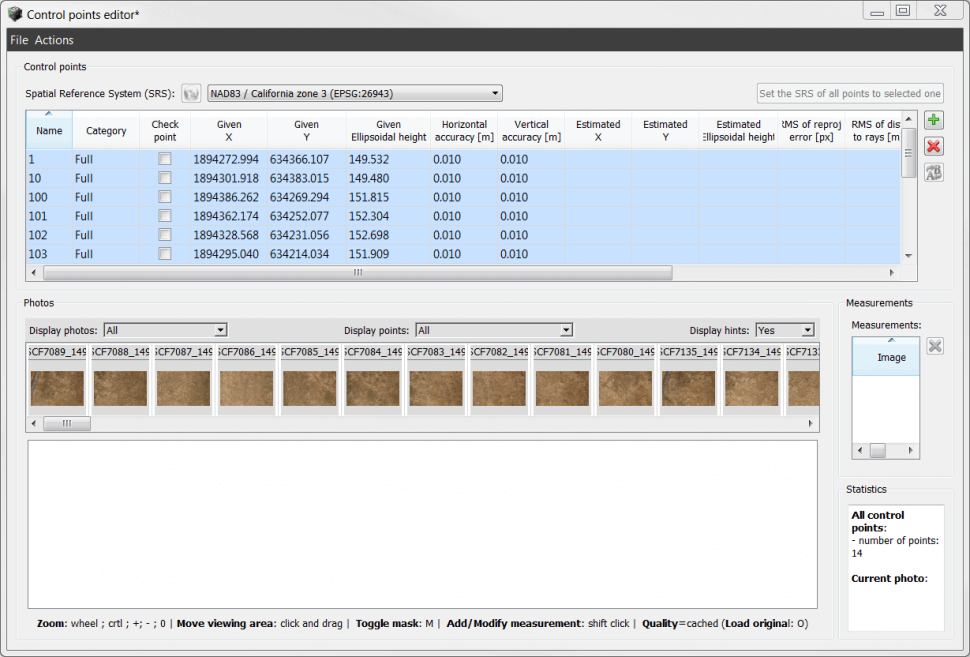
- On the Control points editor screen, from the drop down menu, select the spatial reference system for the control points to be used.
-
To add control points perform either of the two options listed below:
- Add control points by clicking the green + on the right and enter the coordinates manually.
-
Import coordinates from *.txt or *.csv by clicking File – Import.
- When importing from a *.txt or *.csv file, the file should be space delimited and be in Easting, Northing, Elevation (or Longitude, Latitude, Height)
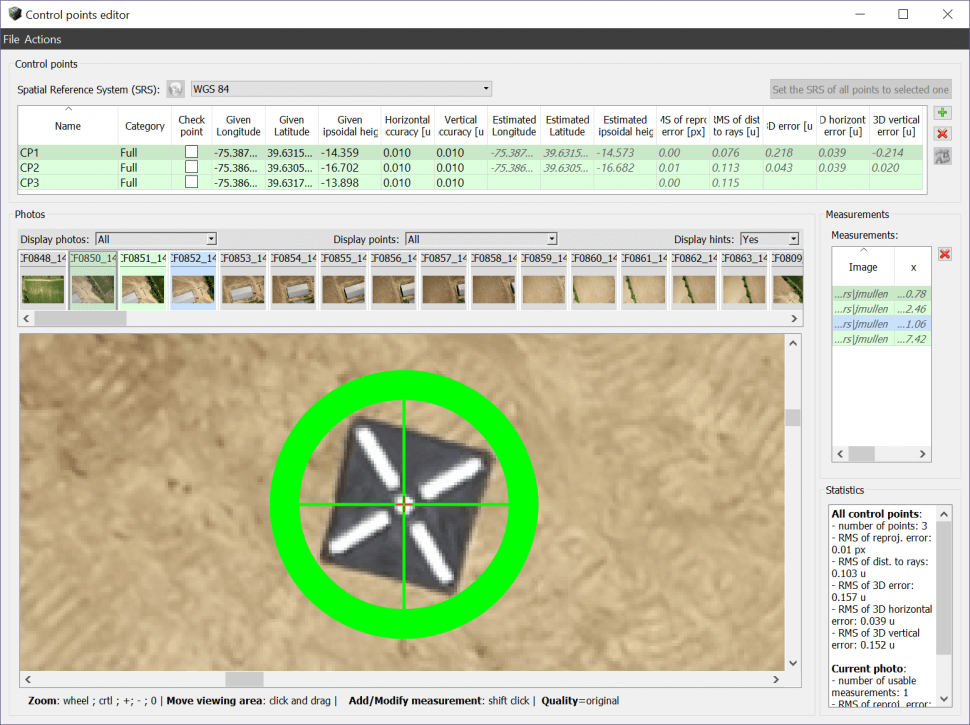
- Select a control point from the created/imported GCP list and then select a corresponding image that contains the GCP target.
- Press Shift + Left click to measure the coordinates of the GCP target in the image.
-
Repeat this process for a minimum of 3 photos for a given GCP target and for a minimum of 3 GCP targets.
- For any GCP targets that will be used as a check point and not for transformation, check the Check Point checkbox for a given GCP.
- Once finished, select File – Save and exit the control points editor screen.
- After performing GCP matching for a given dataset, AT processing must be conducted again to apply changes.
- For the GCP matched block, select the General tab and select Submit Aerotriangulation.
- On the Output block name screen, enter a name for the new block to be created as necessary and select Next.
-
On the Positioning/georeferencing screen, select the following radio button:
- Use control points for adjustment – the block is accurately adjusted to control points (advised with accurate control points).
- Once finished, select Next.

-
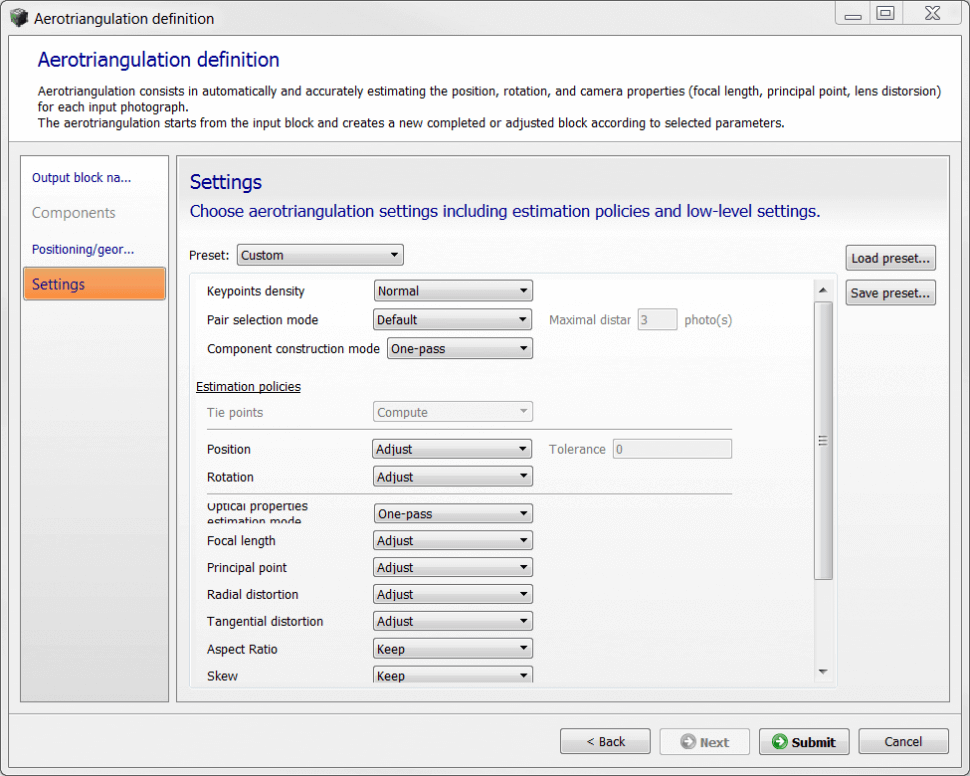
On the Settings screen, leave all settings at their default values except for the following:
- Position: Adjust
- Rotation: Adjust
- Tangential Distortion: Adjust
- Once finished, select Submit to begin AT processing.
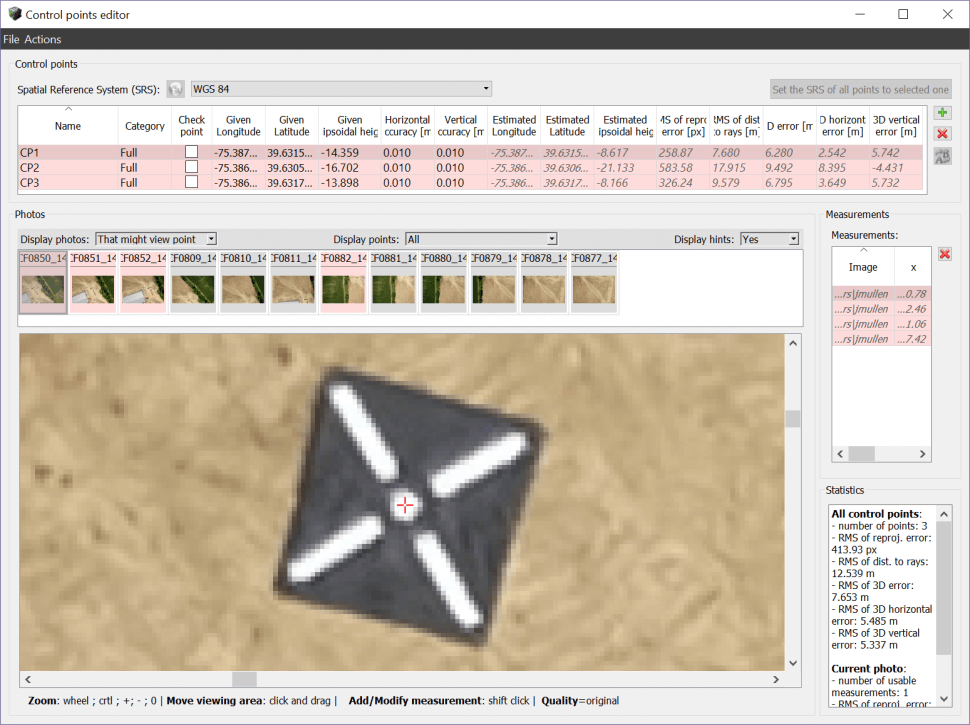
- Once AT processing has been completed, the horizontal/vertical accuracy and RMS values of the GCP matching can be viewed.
- Select the AT processed and GCP matched photo block from the left side of the screen and select the Surveys tab.
- Select Edit Control Points to open the Control point editor screen to view GCP matching metrics.
- Once finished, close the Control points editor screen.