Post Processing – Data Import
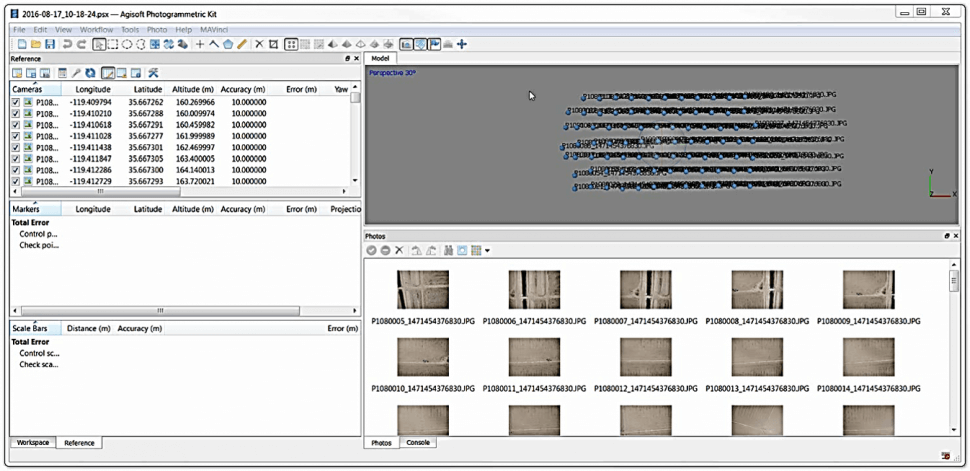
- After installing Agisoft, the first step in order to begin post processing is to load the collected imagery and their corresponding metadata.
- Open Agisoft Photogrammetric Software for Topcon.
- Select File → Open, or click the open icon located within the toolbar.
-
Navigate to the location of the MAVinci SIRIUS PRO project exported from MAVinci Desktop (*.psx file).
- If exporting the project file from MAVinci Desktop, Agisoft will open the project automatically if installed on the PC.

Post Processing - MAVinci Plugin Settings
- Once the Agisoft project file for the collected MAVinci UAS data is opened, the post-processing settings for the MAVinci plugin need to be determined.
- Select MAVinci – Settings.
-
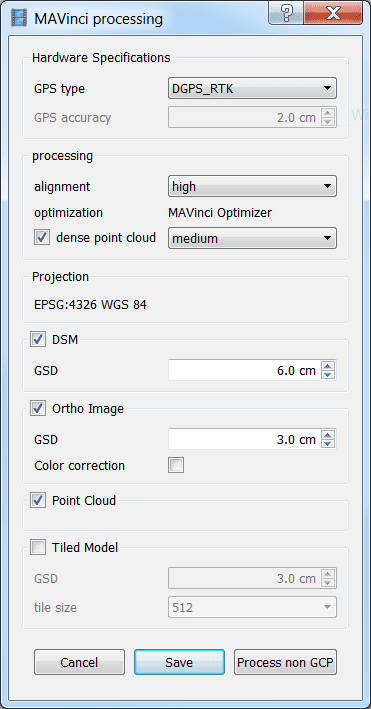
In the MAVinci processing settings menu, select the following:
- Select the GPS type as DGPS_RTK from the pull down menu for the SIRIUS PRO.
- Select the desired photo alignment accuracy from the pull down menu (typically set this as high).

-
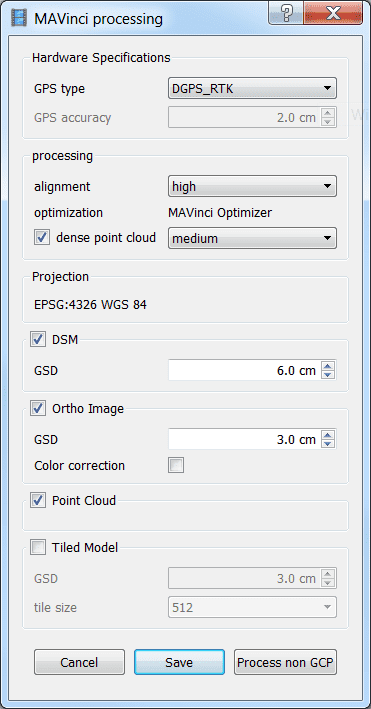
In the MAVinci processing settings menu, select the following:
- Check on the dense point cloud checkbox. Select the desired dense point cloud quality from the pull down menu (typically medium or high).
- Check on the DSM (Digital Surface Model) checkbox. Select the GSD level for the DSM (typically this is set to 2x the GSD level the UAS data was collected at).
- Check the Ortho Image checkbox. Select the GSD level for the orthomosaic (typically this is set to the same GSD level the UAS data was collected at).
- Check off the Color correction checkbox.
- Check on the Point Cloud checkbox.

-
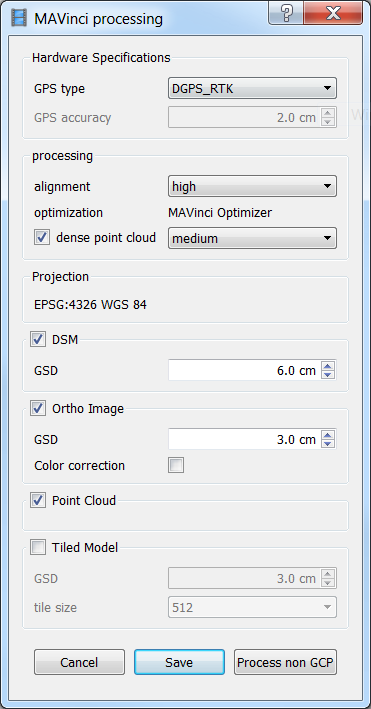
In the MAVinci processing settings menu, select the following:
- To breakup the orthomosaic into smaller files (if needed), check on the Tiled Model checkbox and set the desired tile size.
- Once all the desired processing settings have been determined, select Save.
- Select MAVinci - Processing without GCP to begin post-processing of the MAVinci SIRIUS PRO UAS data.
