Connecting to the WLAN Connector
- Remove the WLAN Connector from the transport case.
- Attach the LiPo battery cable and wireless antenna to the WLAN Connector.
- To power on the WLAN Connector, connect a charged LiPo battery to the LiPo battery cable. Confirm the Power LED turns on.
- After 30-60 seconds, the Status LED on the WLAN Connector should start blinking rapidly.

- On the user’s PC, search for available wireless networks. Connect to the MAVinci Connector.
- Enter the network password as mavinciconnector
- Open MAVinci Desktop. Create/Open a session.
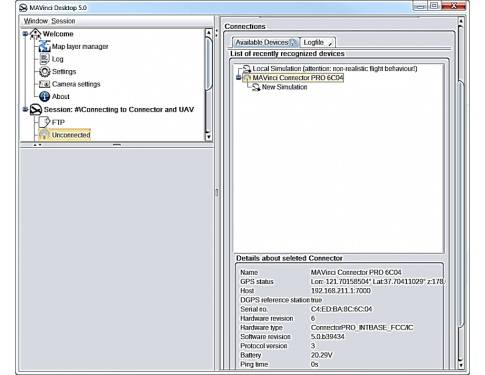
- In the Session Panel in the upper left part of the screen, select the Unconnected option.
- Confirm under the Available Devices tab that the MAVinci Connector appears.
Connecting to the UAV
- Remove the UAV fuselage from the transport case.
- Remove the plastic sleeve and motor security lock band from the fuselage.
- Rotate the UAV engine slightly so the cockpit canopy is unobstructed by the propellers.
- Remove the cockpit canopy from the fuselage.
- Place a charged LiPo battery into the cockpit and secure with the battery strap located in the cockpit.
- Connect the LiPo battery cable to the corresponding connector in the UAV cockpit.
- Replace the cockpit canopy and motor security lock band.
-
After approximately 30 - 60 seconds, confirm the UAV has initialized by checking the onboard display screen, which includes:
- UAV battery status
- GNSS Satellite status
-
UAV status messages, including:
- “Waiting for GPS Time”
- “Send Flightplan”

- In the MAVinci Desktop session, on the Session Panel, select the Unconnected option.
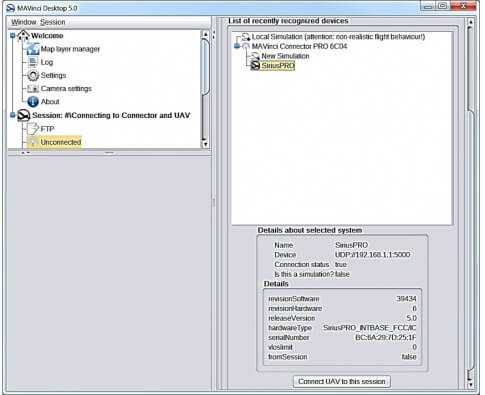
- Confirm under the Available Devices tab that the Sirius PRO appears.
- Select the Sirius PRO on the Available Devices tab.
- Select Connect UAV to this session.
- Please note that in order for the user to connect to the UAV, the connection to the WLAN Connector must be completed first.
-
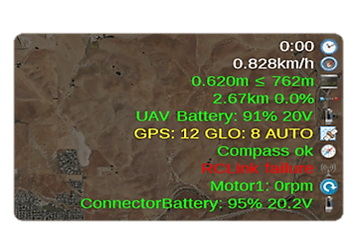
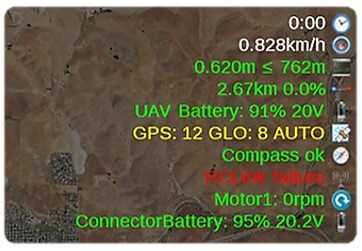
Confirm that UAS status information is updating in real time on the Map View, including:
- UAV and Connector battery status
- GNSS Satellite Status
- Current Altitude
- Compass status
- Any error/warning messages
- Confirm that the Altimeter graph below the Session Panel is updating in real time (requires a GNSS position solution).
- Confirm that the Unconnected option in the Session Panel now reads Plane: SiriusPRO.
Updating UAV/Connector Firmware
- Open MAVinci Desktop. Create/Open a session.
- Connect to the WLAN Connector and UAV.
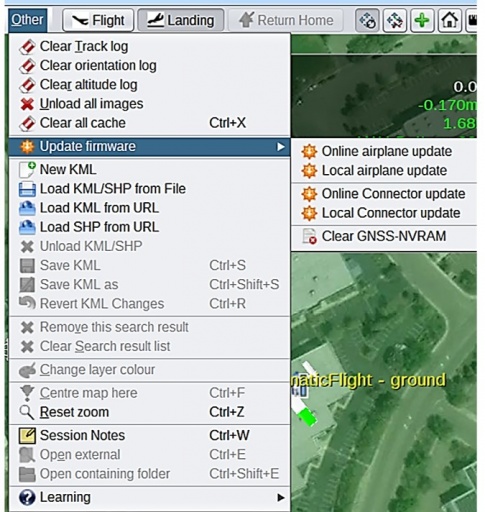
- For the WLAN Connector, Select Other – Update firmware – Online Connector update.
- If a firmware update is available, follow the onscreen instructions to update.
- The firmware update will take several minutes to complete. Once finished, the Status LED on the WLAN Connector will blink rapidly again.
- For the UAV, Select Other – Update firmware – Online airplane update.
- If a firmware update is available for the UAV, follow the onscreen instructions to update.
- The firmware update will take several minutes to complete. Once finished, confirm the UAV has initialized via the onboard display.
- Reconnect to the UAV in MAVinci Desktop.
Internal Base RTK Setup
- Connect an external GNSS antenna to the GNSS antenna port of the WLAN Connector.
- Place both the UAV and the WLAN Connector under open sky GNSS conditions.
- Open MAVinci Desktop. Create/Open a session.
- Connect to the WLAN Connector and UAV in MAVinci Desktop.
- Allow both the WLAN Connector and UAV to track GNSS satellites for approximately 10-15 minutes.
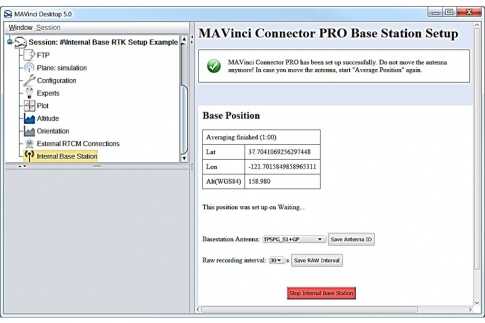
- On the Session Panel, select Internal Base Station.
- Select the base station antenna type connected to the WLAN Connector from the pull down menu.
- Select the Raw data recording interval from the pull down menu.
- Select Start Internal Base Station.
- Note the Internal base station will start automatically if placed on a previously used position.
- Return to the Map View.
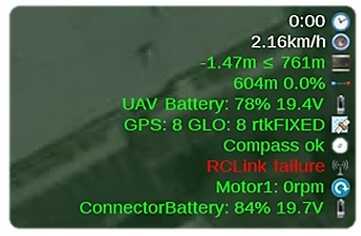
- Confirm in the UAS status information that the UAV reports an RTK Fixed solution.
- Connect an external GNSS antenna to the GNSS antenna port of the WLAN Connector.
- Place both the UAV and the WLAN Connector under open sky GNSS conditions.
- Open MAVinci Desktop. Create/Open a session.
- Connect to the WLAN Connector and UAV in MAVinci Desktop.
- Allow both the WLAN Connector and UAV to track GNSS satellites for approximately 10-15 minutes.
Transmitting a Flight Plan
- Create a new flight plan (i.e. basic polygon, terrain, etc.) near where the UAV and WLAN Connector are currently located on the Map View.
- Select Edit – Recalculate Flight Plan.
- Don’t split the flight plan if prompted and acknowledge any warning messages that appear.
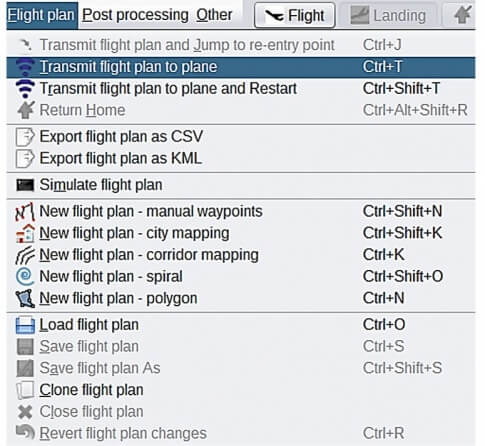
- Select Flight Plan – Transmit Flight Plan to plane.
- Select Ok to the Check Wing Connection window that appears.
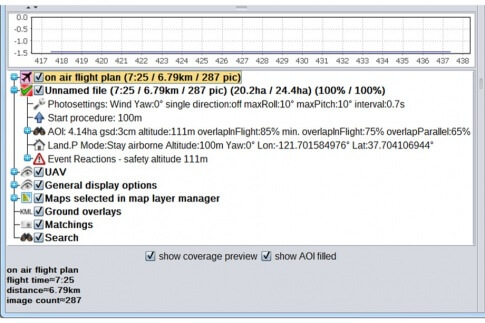
- Confirm that the flight plan has been transmitted to the UAV by checking the following:
- On the Detail Panel, confirm the metrics for the created flight plan are identical to the metrics of the on air flight plan.
- The flight lines for the on air flight plan will display on the Map View in pink.